


The Versatility and Impact of Window Graphics
Windows are one of the most underutilized yet high-impact advertising and branding surfaces available to businesses. Many storefronts pair window graphics with a custom American-style LED neon business sign for bold after-dark visibility. Window graphics—including vinyl decals, frosted/etched film, privacy film, perforated window film, and custom-printed graphics—transform ordinary glass surfaces into powerful marketing tools, privacy screens, brand statements, and wayfinding elements. For retail stores, restaurants, salons, spas, offices, healthcare facilities, schools, and corporate buildings, window graphics offer a cost-effective, versatile, and visually striking way to communicate with customers, enhance privacy, reinforce brand identity, and create a welcoming, professional environment. Together with fascia and storefront signs, they form a complete street-level branding package.
Window graphics are unique in their versatility: they can be temporary (promotional decals that are changed monthly or quarterly) or permanent (frosted privacy film that lasts for years); they can cover an entire window (full-window graphics or privacy film) or be small, targeted decals (business hours, logos, promotional messages); they can be opaque (blocking all visibility), translucent (allowing light through but obscuring visibility), or perforated (allowing one-way visibility from inside while displaying graphics from outside). This versatility makes window graphics suitable for a wide range of applications, from storefront advertising and branding to office privacy, healthcare confidentiality, retail merchandising, and decorative design.
This guide provides a comprehensive overview of window graphics and frosted vinyl signage, covering the different types of window film and graphics, design considerations, surface preparation, installation methods (wet vs. dry application), removal and replacement, durability and maintenance, regulatory considerations, and best practices for various applications. Whether you are planning storefront graphics for a retail business, privacy film for an office or healthcare facility, or decorative window film for a restaurant or salon, this guide will help you understand the options and make informed decisions for your project.
Types of Window Graphics and Vinyl Film
Window graphics and vinyl film come in several types, each with different properties, applications, and visual effects. Understanding the different types helps you choose the right product for your specific needs, budget, and desired appearance. Our guide to sign materials compares the durability and performance of common vinyl and film substrates.
1. Perforated Window Film (One-Way Vision)
Perforated window film (also called one-way vision film, see-through graphics, or perforated vinyl) is a vinyl film with tiny, uniform holes (perforations) that allow visibility from one side while displaying a printed graphic on the other side. The film is typically applied to the exterior of a window, with the printed graphic facing outward (visible from outside) and the perforated side facing inward (allowing people inside to see out). The perforations typically cover 30–50% of the film’s surface area (commonly 50% holes / 50% vinyl, or 40% holes / 60% vinyl), allowing sufficient visibility from the inside while maintaining a solid, opaque appearance from the outside (the holes are not visible from a distance due to the printed graphic covering the vinyl areas).
Advantages of perforated window film:
- Allows full-color, high-impact graphics on the exterior of windows while maintaining visibility from the inside (unlike opaque vinyl, which blocks all visibility from both sides)
- Ideal for storefront advertising, promotions, branding, and seasonal displays, as it allows businesses to use their entire window surface for marketing without blocking the view from inside or making the interior feel dark or closed off
- Provides some UV protection and heat reduction (the vinyl areas block UV rays and solar heat, reducing fading of interior furnishings and lowering cooling costs)
- Can be printed with high-resolution, full-color graphics (photos, logos, text, designs) using digital printing (UV-curable, solvent, or latex inks)
- Available in different perforation patterns (hole size, percentage of holes) to balance visibility from the inside with graphic quality from the outside (more holes = better visibility from inside, slightly less opaque graphic from outside; fewer holes = more opaque graphic from outside, slightly less visibility from inside)
Limitations of perforated window film:
- More expensive than standard opaque or translucent vinyl due to the specialized perforated material and printing process
- Visibility from the inside is reduced compared to clear glass (the perforations create a screen-door effect, and the view is slightly darkened and textured, particularly in low-light conditions or at night when interior lights are on)
- At night, when the interior is lit and the exterior is dark, the one-way effect reverses—people outside can see into the building (through the perforations), while people inside see the graphic (the printed side becomes visible from inside due to the interior lighting). This means perforated film does not provide privacy at night unless interior lights are dimmed or additional window treatments (blinds, curtains) are used.
- Durability is slightly lower than solid vinyl due to the perforations (the holes can collect dirt, moisture, or debris over time, and the film may be more prone to tearing or lifting at the perforation edges)
- Requires lamination (a clear protective overlaminate) for outdoor use to protect the printed graphic from UV fading, weather, and abrasion, adding to the cost and thickness of the film
Common applications: Storefront advertising and promotions, retail window displays, restaurant windows, salon/spa windows, vehicle windows (car wraps, bus wraps, fleet graphics), building windows (for branding or decorative purposes), and temporary event signage.
2. Opaque Window Vinyl (Solid / Block-Out)
Opaque window vinyl (also called solid vinyl, block-out vinyl, or opaque decals) is a solid, non-transparent vinyl film that blocks all visibility through the window, both from the outside and the inside. Opaque vinyl is available in a wide range of solid colors (including custom Pantone-matched colors) and can be printed with full-color graphics, text, logos, or designs. It is typically applied to the exterior or interior of windows and provides complete privacy and light blocking, making it ideal for applications where visibility through the window is not desired or where a solid, high-contrast graphic is needed.
Advantages of opaque window vinyl:
- Provides complete privacy and light blocking (no visibility through the window from either side), making it ideal for applications where privacy or light control is needed (e.g., office windows facing a public area, healthcare facilities, dressing rooms, storage areas, windows that need to be blacked out for projection or displays)
- Available in a wide range of solid colors and can be printed with high-resolution, full-color graphics, providing maximum design flexibility and color vibrancy (colors appear more vibrant and saturated on opaque vinyl than on translucent or perforated film, as there is no backlighting or transparency affecting the color)
- More economical than perforated or frosted/etched film, as it uses standard vinyl material and printing processes
- Durable and long-lasting (5–7 years outdoor lifespan for high-quality opaque vinyl with UV-curable or solvent inks and lamination), with good resistance to UV fading, weather, and abrasion
- Can be cut into custom shapes (letters, logos, graphics) using a plotter/cutter, or printed as full-coverage graphics using digital printing
Limitations of opaque window vinyl:
- Blocks all visibility through the window, which may not be desirable for applications where natural light or visibility from the inside is important (e.g., retail storefronts where you want customers to see inside, offices where you want to maintain a view)
- Can make interiors feel dark, closed off, or cave-like if applied to large window areas, as it blocks all natural light
- Does not provide the one-way visibility of perforated film or the decorative, semi-transparent effect of frosted/etched film
- For exterior application, opaque vinyl can be more visible from the inside (the adhesive side or backing may be visible from inside, particularly if the vinyl is not properly applied or if there are air bubbles or imperfections)
Common applications: Window lettering and logos (business name, hours, contact information), promotional decals and stickers, privacy film for offices/healthcare/dressing rooms, blackout film for projection rooms or displays, decorative window graphics (where visibility is not needed), and temporary promotional signage (sales, events, seasonal displays).
3. Frosted / Etched Window Film (Translucent / Privacy)
Frosted or etched window film (also called frosted vinyl, etched glass film, privacy film, or satin finish film) is a translucent, matte-finish vinyl film that diffuses light and obscures visibility through the window while still allowing natural light to pass through. Frosted/etched film creates the appearance of frosted or etched glass at a fraction of the cost of actual etched glass, and it is available in a range of finishes (matte, satin, textured, patterned) and opacities (from lightly frosted to nearly opaque). Frosted/etched film can be applied as full-coverage film (covering the entire window for complete privacy while maintaining light transmission) or as cut graphics/decorative elements (logos, patterns, borders, stripes, custom designs) that create a decorative, branded privacy effect.
Advantages of frosted/etched window film:
- Provides privacy while maintaining natural light transmission—frosted/etched film obscures visibility through the window (preventing people from seeing in or out) while still allowing natural light to pass through, creating a bright, open, and private environment (unlike opaque vinyl, which blocks all light and can make interiors feel dark)
- Creates a premium, elegant, professional appearance that mimics the look of etched or frosted glass at a fraction of the cost, making it ideal for offices, conference rooms, executive suites, healthcare facilities, salons/spas, restaurants, and retail environments where a sophisticated, professional look is desired
- Available in a wide range of finishes, textures, and patterns (matte, satin, linen, rice paper, geometric patterns, custom designs), allowing for significant customization and decorative effects
- Can be cut into custom shapes, logos, patterns, borders, or text using a plotter/cutter, or printed with subtle designs or gradients (for more complex decorative effects), allowing for branded, personalized window treatments
- Provides UV protection (blocks up to 99% of UV rays) and reduces heat/glare, protecting interior furnishings from fading and improving comfort by reducing harsh sunlight and glare
- Durable and long-lasting (7–10 years lifespan for high-quality frosted/etched film, with some products rated for up to 15 years), with good resistance to UV fading, moisture, and cleaning
- Removable and replaceable—frosted/etched film can be removed without damaging the glass (if properly applied and removed using the correct techniques), allowing for updates or changes to the window treatment as needs evolve
Limitations of frosted/etched window film:
- More expensive than standard opaque vinyl due to the specialized frosted/etched material and finish
- Does not provide complete visibility blocking in all conditions—at night, when the interior is lit and the exterior is dark, frosted/etched film may become more transparent (allowing some visibility into the building, particularly if the interior is brightly lit and the exterior is dark). For applications requiring nighttime privacy (e.g., ground-floor offices, healthcare facilities), additional window treatments (blinds, curtains) or a higher-opacity frosted film may be needed.
- Installation requires more skill and precision than standard opaque vinyl, particularly for full-coverage applications (large sheets of frosted film can be difficult to handle and apply without bubbles, wrinkles, or misalignment, and the matte finish makes imperfections more visible than on glossy vinyl)
- The frosted/etched finish can show fingerprints, smudges, and cleaning marks more readily than glossy vinyl, requiring more careful handling and cleaning to maintain a pristine appearance
- Printing on frosted/etched film is more limited than on opaque or perforated vinyl—while some frosted films are printable, the matte, translucent finish can affect color vibrancy and print quality, and complex, high-resolution graphics may not reproduce as well as on opaque vinyl. For complex graphics, it is often better to cut the frosted film into shapes (negative space) rather than printing directly on it.
Common applications: Office and conference room privacy windows, executive suite windows, healthcare facility windows (patient rooms, consultation rooms, lab areas), salon/spa treatment rooms, restaurant and bar windows (for privacy while maintaining light), retail fitting rooms and display windows, building lobbies and entrance glass, interior glass partitions and doors, decorative window borders and patterns, branded window graphics (logos, taglines, patterns), and shower/bathroom windows (for privacy in wet areas). For healthcare facilities, pair frosted window film with ADA-compliant room and restroom signs to meet accessibility requirements.
4. Translucent Window Film (Light-Diffusing / Decorative)
Translucent window film is a semi-transparent vinyl film that allows light to pass through while diffusing or coloring the light, creating a decorative, colored, or light-diffusing effect. Translucent film is available in a wide range of colors (including custom colors) and finishes (matte, glossy, textured), and it can be used to create colored glass effects, light-diffusing panels, or decorative window elements. Unlike frosted/etched film (which is specifically designed for privacy and has a matte, frosted appearance), translucent film is generally more transparent and is used primarily for decorative or light-diffusing purposes rather than complete privacy.
Advantages of translucent window film:
- Creates decorative, colored, or light-diffusing effects on windows, allowing for creative, branded, or atmospheric window treatments (e.g., colored glass effects, gradient colors, light-diffusing panels for backlit displays)
- Allows natural light to pass through while diffusing or coloring the light, creating a soft, colored, or ambient light effect in the interior space
- Available in a wide range of colors, finishes, and opacities, allowing for significant customization and decorative effects
- Can be printed with graphics or cut into custom shapes, logos, or patterns for branded or decorative window treatments
- More economical than stained glass or colored glass, providing a similar decorative effect at a fraction of the cost
- Provides some UV protection and heat reduction, depending on the film’s opacity and color
Limitations of translucent window film:
- Does not provide complete privacy (translucent film is semi-transparent, allowing some visibility through the window, particularly in certain lighting conditions; for privacy applications, frosted/etched film or opaque vinyl is more appropriate)
- Colors may appear different when backlit (by natural light from outside) vs. when viewed in reflected light, and color vibrancy may be affected by the transparency of the film
- Less common and more specialized than opaque, perforated, or frosted/etched film, with fewer product options and suppliers
- Installation requires skill and precision, particularly for full-coverage applications, and the translucent finish can show imperfections (bubbles, wrinkles, misalignment) more readily than opaque vinyl
Common applications: Decorative window treatments (colored glass effects, gradients, patterns), backlit display panels and custom flat LED light boxes, stained glass effects for churches or historic buildings, branded window graphics (colored logos or patterns), light-diffusing panels for offices or studios, and decorative elements for restaurants, bars, or retail environments.
5. Clear / Transparent Window Film (Protective / Anti-Graffiti)
Clear or transparent window film is a fully transparent vinyl film that is applied to windows to provide protection (scratch resistance, anti-graffiti, UV protection, safety/security) without changing the appearance of the glass. Clear window film is available in different thicknesses and formulations, including standard clear vinyl (for temporary protection or as a laminate for printed graphics), anti-graffiti film (a sacrificial layer that can be removed and replaced if graffiti is applied), safety/security film (a thick, tough film that holds glass together if it breaks, preventing injury and deterring break-ins), and UV-blocking film (blocks UV rays to protect interior furnishings from fading).
Common applications: Protection for storefront windows (anti-graffiti, scratch resistance), safety/security film for ground-floor windows and glass doors, UV protection for retail displays and office windows, and as a protective laminate for printed window graphics (perforated film, translucent film) to enhance durability and weather resistance.
6. Static Cling Window Film (Reusable / Temporary)
Static cling window film is a vinyl film that uses static electricity (rather than adhesive) to adhere to smooth glass surfaces, making it reusable, repositionable, and easy to remove without leaving residue. Static cling film is available in opaque, translucent, or frosted/etched finishes, and it is ideal for temporary or short-term applications where removability and reusability are important (e.g., seasonal promotions, event signage, temporary privacy, rental properties where permanent film is not allowed).
Advantages of static cling film:
- Reusable and repositionable—static cling film can be removed and reapplied multiple times without losing adhesion or leaving residue, making it ideal for temporary or changing applications
- Easy to install and remove without special tools or expertise, making it suitable for DIY installation
- No adhesive means no residue left on the glass when removed, protecting the window surface and making cleanup easy
- Available in a range of finishes (opaque, translucent, frosted/etched, clear) and can be printed with graphics or cut into custom shapes
Limitations of static cling film:
- Less durable and secure than adhesive-backed vinyl—static cling film can peel or fall off if not properly applied, particularly in extreme temperatures or if exposed to moisture or wind
- Not suitable for long-term or permanent applications (lifespan is typically 6–12 months for outdoor use, shorter in harsh conditions)
- Limited product options compared to adhesive-backed vinyl (fewer finishes, colors, and thicknesses available)
- Adhesion depends on the glass surface being clean, smooth, and free of contaminants—static cling film may not adhere well to textured, dirty, or coated glass surfaces
Common applications: Temporary promotional signage (sales, events, seasonal displays), temporary privacy for offices or meeting rooms, rental properties (where permanent film is not allowed), reusable event signage (trade shows, pop-up shops), and DIY window treatments for homes or small businesses.
Design Considerations for Window Graphics
Effective window graphic design requires careful consideration of the application, viewing conditions, brand identity, and functional requirements (privacy, light transmission, visibility). The following design considerations will help you create window graphics that are visually striking, functional, and effective:
1. Determine the Primary Purpose and Function
Before designing window graphics, clearly define the primary purpose and function of the graphics, as this will determine the type of film, design approach, and placement:
- Advertising/promotional: If the primary purpose is to advertise products, services, sales, or events, use perforated window film (for full-window graphics that maintain visibility from inside) or opaque vinyl decals (for targeted messages, logos, or promotional text). Design with high-impact visuals, clear messaging, and strong calls to action, and place graphics at eye level for maximum visibility from the sidewalk or street.
- Branding/identity: If the primary purpose is to reinforce brand identity (business name, logo, tagline, brand colors), use opaque vinyl lettering/logos (for crisp, high-contrast branding) or frosted/etched film (for elegant, subtle branded patterns or logos). Ensure the design is consistent with your brand identity (colors, fonts, logo, design style) and place branding elements prominently (e.g., business name above the entrance, logo on the front window).
- Privacy/light control: If the primary purpose is to provide privacy while maintaining natural light, use frosted/etched window film (for semi-private, light-transmitting privacy) or opaque vinyl (for complete privacy and light blocking). Consider the level of privacy needed (daytime only vs. 24/7), the desired light transmission, and the aesthetic appearance (frosted/etched for a premium look, opaque for a bold, solid look).
- Decorative/atmospheric: If the primary purpose is decorative (creating a specific atmosphere, pattern, or visual effect), use frosted/etched film (for elegant patterns, borders, or textures), translucent film (for colored or light-diffusing effects), custom-printed graphics (for complex designs, murals, or photographic images), or faux neon acrylic wall signs for a playful, glowing accent. Consider the overall interior/exterior design aesthetic and ensure the window graphics complement the space’s design rather than clashing with it.
- Informational/wayfinding: If the primary purpose is to provide information (business hours, contact information, entrance/exit identification, wayfinding), use opaque vinyl lettering or decals (for clear, high-contrast text) placed in visible, accessible locations (e.g., hours on the entrance door, entrance identification above the door). Ensure text is large enough to be read from a distance and uses a clear, legible font.
2. Consider Viewing Conditions and Visibility
Window graphics are viewed from both outside and inside, and the viewing conditions (distance, angle, lighting, time of day) significantly affect the design and effectiveness of the graphics:
- Viewing distance and text size: Determine the primary viewing distance for the graphics (e.g., from the sidewalk 10–20 feet away, from the road 50+ feet away, from inside the office 5–10 feet away) and size text and graphics accordingly. As a general rule, 1 inch of text height is readable from approximately 30–50 feet, but for window graphics (which may be viewed from closer distances), use larger text for key messages (business name, logo) and smaller text for secondary information (hours, contact details). Ensure the most important information (business name, primary message) is large enough to be read from the farthest intended viewing distance.
- Lighting and time of day: Consider how the graphics will look in different lighting conditions (daytime vs. nighttime, direct sunlight vs. overcast, interior lighting vs. exterior lighting). For perforated film, remember that the one-way effect reverses at night (when interior lights are on), so if nighttime privacy is important, consider additional window treatments or a higher-opacity film. For frosted/etched film, the appearance may change depending on the lighting (more transparent in bright backlight, more opaque in reflected light), so test the film in the actual window and lighting conditions before full installation. For opaque vinyl, ensure the graphics are visible and legible in both daylight and nighttime (consider adding exterior lighting if the window is not well-lit at night).
- Viewing angle: Consider the primary viewing angle for the graphics (straight-on, from an angle, from above/below) and design accordingly. For graphics viewed from an angle (e.g., a storefront window viewed from the sidewalk at an angle), ensure text and graphics are not distorted or obscured when viewed from that angle, and consider placing key information in the center of the window (where it is most visible from all angles). For perforated film, the graphic quality and visibility may be slightly reduced when viewed from extreme angles, so ensure key information is placed in areas viewed from the most common angles.
- Interior vs. exterior appearance: Consider how the graphics will look from both outside and inside, as the appearance can differ significantly depending on the film type. For perforated film, the exterior shows the printed graphic while the interior shows the perforated, screen-door effect; for frosted/etched film, both sides show the frosted appearance (but the opacity may differ depending on lighting); for opaque vinyl, the exterior shows the printed/colored side while the interior shows the adhesive/backing side (which may be less attractive, so consider applying opaque vinyl to the interior for a cleaner interior appearance, or use a double-sided film if both sides need to look good).
3. Choose the Right Film Type and Opacity
Selecting the right film type and opacity is critical to achieving the desired appearance, privacy, light transmission, and durability. Consider the following factors when choosing a film type:
- Privacy requirements: Determine the level of privacy needed (no privacy, partial privacy, complete privacy) and the times when privacy is needed (daytime only, 24/7). For no privacy (advertising/branding where visibility is desired), use perforated film or clear/translucent film. For partial privacy (obscuring visibility while maintaining light), use frosted/etched film (choose a higher-opacity frosted film for more privacy, lower-opacity for less). For complete privacy (blocking all visibility), use opaque vinyl or a high-opacity frosted/etched film (note: even high-opacity frosted film may allow some visibility in certain lighting conditions, so opaque vinyl is the most reliable for complete privacy).
- Light transmission: Determine the desired level of natural light transmission (full light, diffused light, no light). For full light (maintaining clear visibility and maximum natural light), use clear film or perforated film (which maintains some visibility and light transmission). For diffused light (soft, diffused natural light without clear visibility), use frosted/etched or translucent film. For no light (blocking all natural light), use opaque vinyl or blackout film.
- Graphic complexity and color vibrancy: Consider the complexity and color requirements of the graphics. For complex, high-resolution, full-color graphics (photos, detailed designs, vibrant colors), use opaque vinyl or perforated film (which provide the best color vibrancy and print quality). For simple text, logos, or patterns, use any film type (opaque, frosted/etched, translucent) depending on the desired appearance. For subtle, elegant, or monochromatic designs, use frosted/etched film (which creates a sophisticated, etched-glass effect without vibrant colors).
- Durability and lifespan: Consider the expected lifespan of the graphics (temporary, semi-permanent, permanent). For temporary applications (less than 6 months), use static cling film or removable adhesive vinyl. For semi-permanent applications (1–3 years), use standard adhesive-backed vinyl (opaque, perforated, frosted/etched) with appropriate lamination. For permanent applications (3+ years), use high-quality, durable film (premium frosted/etched film, high-performance opaque vinyl, safety/security film) with UV-stabilized inks and lamination for maximum durability.
- Budget: Consider the budget for the project, as film types vary significantly in cost. From most economical to most expensive: static cling film, opaque vinyl, translucent film, perforated film, frosted/etched film, safety/security film. Balance the desired appearance and functionality with the available budget, and consider using a mix of film types (e.g., frosted/etched film for privacy areas, opaque vinyl for branding/text, perforated film for promotional graphics) to achieve the desired effect within budget.
4. Design for the Specific Window and Building
Window graphics should be designed to fit the specific window dimensions, shape, and building architecture, and to complement the overall design aesthetic of the space:
- Window dimensions and shape: Measure the window accurately (width, height, shape, any mullions or dividers) and design the graphics to fit the window dimensions, accounting for any window frames, mullions, or hardware that may obstruct the graphics. For full-coverage graphics, ensure the film is sized slightly larger than the glass area (to allow for trimming during installation) and that the design accounts for any window dividers or mullions (which may break up the graphic).
- Building architecture and facade: Consider the building’s architecture, facade materials, and overall design aesthetic when designing window graphics, ensuring the graphics complement rather than clash with the building. For a modern, minimalist building, use clean, simple graphics with a modern font and limited color palette. For a historic or traditional building, use elegant, classic designs with serif fonts and subtle, understated graphics. For a colorful or eclectic building, use bold, vibrant graphics that complement the building’s colors and style.
- Interior design and branding: For interior window graphics (glass partitions, office windows, conference rooms), consider the interior design aesthetic and brand identity, ensuring the graphics complement the interior design (colors, materials, furniture, lighting) and reinforce the brand. For example, in a modern office with neutral colors and clean lines, use frosted/etched film with subtle geometric patterns or the company logo. In a creative agency with bold colors and eclectic design, use vibrant, custom-printed graphics or colored translucent film.
- Placement and composition: Carefully consider the placement and composition of the graphics on the window, ensuring key information (business name, logo, primary message) is placed in the most visible areas (eye level, center of the window, near the entrance) and that the overall composition is balanced and visually appealing. Avoid overcrowding the window with too much text or too many graphics, which can make the window look cluttered and reduce readability. Use negative space (clear or frosted areas) to create balance and draw attention to key elements.
5. Ensure Brand Consistency and Professional Appearance
Window graphics are a key touchpoint in your brand identity, and they should be consistent with your overall brand image and marketing materials:
- Use brand colors and fonts: Use your brand’s approved colors, fonts, and logo versions in all window graphics, ensuring consistency with your website, social media, business cards, signage, and other marketing materials. Avoid using colors or fonts that are not part of your brand identity, as this can create a disjointed, unprofessional appearance.
- Use high-quality, high-resolution graphics: Use high-resolution vector graphics (for logos, text, and simple shapes) and high-resolution raster images (300 DPI at final size for photographs and complex graphics) to ensure crisp, professional print quality. Avoid using low-resolution images or graphics pulled from websites (which are typically 72 DPI and will appear pixelated or blurry when printed at large sizes).
- Proofread all text: Carefully proofread all text in the window graphics (business name, hours, contact information, promotional messages) for spelling, grammar, and accuracy before sending to print. Errors in window graphics are embarrassing and costly to correct, so take the time to proofread carefully and have someone else review the graphics as well.
- Consider professional design and installation: For high-impact, professional window graphics, consider working with a professional graphic designer (to create the design) and a professional window film installer (to ensure proper application). While DIY design and installation are possible for simple graphics, professional design and installation ensure a high-quality, polished result that reflects positively on your business.
Surface Preparation and Installation Methods
Proper surface preparation and installation are critical to the appearance, durability, and longevity of window graphics. For broader guidance on mounting and fastening signage, see our guide to sign installation and mounting methods. Even the best-designed and highest-quality graphics will look poor and fail prematurely if applied to a dirty surface or installed incorrectly. The following are the key steps and considerations for surface preparation and installation:
Surface Preparation
Before applying any window film or graphics, the glass surface must be thoroughly cleaned and prepared to ensure proper adhesion and a smooth, bubble-free application:
- Remove existing graphics or film: If there is existing window film, decals, or stickers on the window, remove them completely using a plastic scraper (to avoid scratching the glass) and a residue remover (such as rubbing alcohol, adhesive remover, or soapy water). Ensure all adhesive residue is removed, as any remaining residue can cause bubbles, poor adhesion, or visible imperfections under the new film.
- Clean the glass thoroughly: Clean the glass using a mild, non-abrasive glass cleaner (or a solution of mild dish soap and water) and a lint-free cloth or squeegee. Remove all dirt, dust, grease, fingerprints, and contaminants from the glass surface. Pay particular attention to the edges and corners of the window, where dirt and debris tend to accumulate.
- Degrease and decontaminate: For particularly dirty or greasy windows (e.g., kitchen windows, restaurant windows, windows near cooking areas), use a degreaser or rubbing alcohol to remove any grease or oil residue, which can prevent proper adhesion of the film.
- Final wipe with alcohol: After cleaning, do a final wipe of the glass with rubbing alcohol (isopropyl alcohol) and a lint-free cloth to remove any remaining cleaning residue, grease, or contaminants. This final alcohol wipe ensures the glass is completely clean and provides the best surface for adhesion.
- Inspect the glass: Inspect the glass for any scratches, chips, cracks, or imperfections that may affect the appearance or adhesion of the film. Note any existing imperfections (so they are not mistaken for installation defects later) and avoid applying film over severely damaged glass (which may need to be repaired or replaced first).
- Ensure proper environmental conditions: Install window film in appropriate environmental conditions—ideal temperature is between 50°F and 90°F (10°C and 32°C), with low humidity and no direct sunlight on the window during installation (direct sunlight can cause the film to dry too quickly, making it difficult to reposition and leading to bubbles or wrinkles). Avoid installing in extreme temperatures (very cold or very hot), high humidity, or windy/dusty conditions, as these can affect adhesion and application quality.
Wet Application Method
The wet application method is the most common and recommended method for applying most types of window film (perforated, opaque, frosted/etched, translucent, clear), particularly for large or full-coverage applications. The wet method involves applying a liquid solution (typically water with a small amount of mild dish soap or application fluid) to the glass and/or the adhesive side of the film, which allows the film to be repositioned on the glass and enables the removal of air bubbles and excess solution with a squeegee.
Wet application steps:
- Prepare the application solution: Mix a solution of clean water and a small amount of mild dish soap (1–2 drops of soap per quart of water) in a spray bottle. The soap acts as a lubricant, allowing the film to slide on the glass and preventing the adhesive from sticking too quickly. Avoid using too much soap (which can reduce adhesion) or harsh chemicals (which can damage the film or adhesive).
- Measure and cut the film: Measure the window dimensions and cut the film to size, leaving a small overlap (1/4″–1/2″) on all edges to allow for trimming after application. For large windows, the film may need to be applied in sections (seams), with careful alignment of the pattern or graphic at the seams.
- Peel the backing and apply solution: Peel the release liner (backing) from the adhesive side of the film, being careful not to touch the adhesive with your fingers (which can leave oils and cause poor adhesion). Spray the adhesive side of the film and the glass surface with the application solution, ensuring both surfaces are thoroughly wet (but not dripping).
- Apply the film to the glass: Carefully position the film on the glass, aligning it with the window edges or desired location. The wet solution allows the film to be slid and repositioned on the glass, so take the time to align it accurately before squeegeeing.
- Squeegee out bubbles and solution: Starting from the center of the film and working outward toward the edges, use a squeegee (wrapped in a soft cloth to avoid scratching the film) to firmly press the film against the glass, pushing out air bubbles and excess solution. Use overlapping strokes and apply firm, even pressure to ensure complete adhesion and remove all bubbles. Pay particular attention to the edges and corners, ensuring they are firmly adhered and free of bubbles.
- Trim the edges: Once the film is applied and all bubbles are removed, use a sharp utility knife or razor blade and a straight edge to trim the excess film from the edges of the window, following the window frame or glass edge precisely. Use a fresh, sharp blade to ensure clean, precise cuts and avoid tearing or lifting the film.
- Final squeegee and cleanup: After trimming, do a final pass with the squeegee to ensure all edges are firmly adhered and any remaining solution is removed. Clean the surface of the film with a clean, damp cloth to remove any remaining solution or fingerprints. Inspect the film for any remaining bubbles, wrinkles, or imperfections, and address them immediately (small bubbles can often be worked out with the squeegee; larger bubbles may require lifting the film and re-applying).
- Allow to cure: Allow the film to cure (dry and fully adhere) for 24–72 hours before touching, cleaning, or exposing to extreme conditions. During the curing period, the remaining moisture under the film will evaporate through the film (for perforated film) or through the edges (for solid film), and the adhesive will fully bond to the glass. Avoid washing or cleaning the film for at least 72 hours after installation to allow the adhesive to fully cure.
Dry Application Method
The dry application method involves applying the film directly to the glass without using a liquid solution, allowing the adhesive to bond immediately upon contact. The dry method is typically used for small decals, lettering, or static cling film, where repositioning is less critical and the film is small enough to apply accurately without solution. The dry method is faster than the wet method but less forgiving—once the adhesive touches the glass, it bonds immediately, making repositioning difficult (and potentially damaging the film or adhesive).
Dry application steps:
- Clean the glass thoroughly: Follow the same surface preparation steps as for wet application, ensuring the glass is completely clean and free of contaminants.
- Measure and position the film: Measure and mark the desired position of the film on the glass using a tape measure and a washable marker or tape. For small decals or lettering, use a level to ensure the film is straight.
- Peel the backing partially: Peel a small portion (1–2 inches) of the release liner from the top edge of the film, exposing the adhesive. Be careful not to touch the adhesive with your fingers.
- Apply the exposed adhesive to the glass: Carefully align the exposed adhesive portion of the film with the marked position on the glass and press it firmly against the glass, starting from the top center and working outward. Use a squeegee or credit card (wrapped in a soft cloth) to press the exposed portion firmly against the glass, ensuring it is straight and properly positioned.
- Peel backing and apply gradually: Once the top portion is securely applied and aligned, gradually peel the remaining release liner from the film while simultaneously pressing the film against the glass with a squeegee, working from top to bottom and from center to edges. Use firm, even pressure to remove air bubbles and ensure complete adhesion. Take your time and ensure the film remains aligned as you apply it.
- Squeegee out bubbles: After the entire film is applied, go over the entire surface with the squeegee, using overlapping strokes and firm pressure to remove any remaining air bubbles and ensure complete adhesion. Pay particular attention to the edges and corners.
- Trim and clean: If necessary, trim any excess film from the edges with a sharp utility knife. Clean the surface of the film with a clean, damp cloth to remove any fingerprints or marks.
- Allow to cure: Allow the film to cure for at least 24 hours before touching or cleaning, allowing the adhesive to fully bond to the glass.
Note: The dry method is not recommended for large or full-coverage window film applications, as it is difficult to avoid bubbles and wrinkles and to reposition the film if it is misaligned. For large applications, always use the wet application method for better control and a smoother, more professional result.
Installation Tips and Best Practices
- Use the right tools: Use professional-quality tools for window film installation, including a spray bottle for application solution, a squeegee (with a soft cloth cover to avoid scratching), a sharp utility knife/razor blade with extra blades, a tape measure, a level, a lint-free cloth, and a plastic scraper (for removing old film). Using the right tools ensures a professional, high-quality installation and reduces the risk of damaging the film or glass.
- Work in a clean, dust-free environment: Install window film in a clean, dust-free environment to minimize the risk of dust or debris getting trapped under the film (which causes visible bubbles or imperfections). Avoid installing in windy or dusty conditions, and keep the work area clean during installation.
- Use the “hinge method” for large graphics: For large graphics or full-coverage film, use the “hinge method” to ensure accurate alignment: apply a strip of masking tape along the top edge of the film (with the backing still on) to hold it in position on the glass, then peel the backing from the top portion and apply it to the glass (creating a “hinge”), then remove the tape and peel the remaining backing while applying the film from top to bottom. This method ensures accurate alignment and makes large graphics easier to handle.
- Avoid stretching the film: Do not stretch or pull the film during application, as this can cause distortion, shrinkage, or poor adhesion. Apply the film naturally, allowing it to lay flat on the glass without tension.
- Pay attention to seams: For windows larger than the film width (typically 48–60 inches), the film will need to be applied in sections with seams. Ensure the seams are carefully aligned (matching the pattern or graphic precisely) and overlapped slightly (1/8″–1/4″) to avoid gaps. Use a sharp knife to cut through both layers of film at the seam (creating a “butt joint” for a seamless appearance) and remove the excess film from both layers.
- Consider professional installation: For large, complex, or high-value window graphic projects, consider hiring a professional window film installer. Professional installers have the experience, tools, and expertise to ensure a smooth, bubble-free, professional installation, particularly for large or full-coverage applications, perforated film, or frosted/etched film (which can be more difficult to install). The cost of professional installation is often worth it to avoid the risk of damaging expensive film or achieving a poor-quality result.
Removal and Replacement of Window Graphics
Window graphics are often temporary or semi-permanent, and at some point, they will need to be removed and replaced (e.g., when a promotion ends, when branding changes, when the film becomes damaged or faded, or when the tenant moves out). Proper removal techniques ensure the film is removed cleanly without damaging the glass or leaving adhesive residue, making it easier to apply new graphics.
Removal Methods
The removal method depends on the type of film, the adhesive type, and how long the film has been applied:
- Static cling film: Static cling film is the easiest to remove—simply peel it off the glass starting from a corner or edge. Static cling film leaves no adhesive residue and can be reused or repositioned if it is still in good condition.
- Removable adhesive vinyl (temporary): Removable adhesive vinyl (designed for short-term applications, typically 6 months to 3 years) can usually be peeled off the glass by hand, starting from a corner or edge. If the film is stubborn or has been applied for a long time, use a plastic scraper (to avoid scratching the glass) to gently lift the edge and peel it off. Removable adhesive should leave minimal residue, but any remaining residue can be cleaned with rubbing alcohol or adhesive remover.
- Permanent adhesive vinyl (long-term): Permanent adhesive vinyl (designed for long-term applications, 3+ years) is more difficult to remove and may leave significant adhesive residue. To remove permanent vinyl:
- Heat the film with a heat gun or hair dryer (on low to medium heat) to soften the adhesive, making it easier to peel. Hold the heat gun 6–12 inches from the film and move it continuously to avoid overheating or damaging the glass (particularly if the glass is tempered or insulated).
- Starting from a corner or edge, use a plastic scraper or your fingernail to gently lift the edge of the film. Once the edge is lifted, slowly and steadily peel the film off the glass at a 180-degree angle (pulling the film back against itself, which reduces the risk of the film breaking and minimizes adhesive residue). Use the heat gun as needed to keep the adhesive soft.
- If the film tears or breaks, use the plastic scraper to lift the remaining pieces and continue peeling. Avoid using metal scrapers or razor blades on the glass, as these can scratch the glass surface (use plastic scrapers instead).
- After removing the film, clean any remaining adhesive residue with rubbing alcohol, adhesive remover (e.g., Goo Gone, WD-40), or a solution of warm water and dish soap. Apply the remover to the residue, let it sit for a few minutes to soften, then wipe it away with a clean cloth or plastic scraper. Repeat as needed until all residue is removed.
- After removing all residue, clean the glass thoroughly with glass cleaner and a lint-free cloth before applying new graphics.
- Frosted/etched film: Frosted/etched film is typically removed using the same method as permanent adhesive vinyl (heat + slow peeling). Frosted/etched film may be more brittle than standard vinyl (particularly if it has been applied for several years), so take extra care to peel it slowly and use heat as needed to prevent breaking. The matte, textured surface of frosted/etched film can make adhesive residue more visible, so ensure all residue is thoroughly cleaned before applying new film.
- Perforated film: Perforated film is removed using the same method as permanent adhesive vinyl (heat + slow peeling). The perforations can make the film more prone to tearing during removal, so peel slowly and carefully. Perforated film may leave adhesive residue around the perforation holes, which can be more difficult to clean—use adhesive remover and a plastic scraper to ensure all residue is removed from the perforation areas.
Removal Tips and Best Practices
- Use heat to soften adhesive: Heat is the most effective way to soften adhesive and make film easier to remove. Use a heat gun or hair dryer on low to medium heat, keeping it moving continuously to avoid overheating the glass (particularly for tempered or insulated glass, which can crack if heated unevenly). If you don’t have a heat gun, you can use a hair dryer (on high heat) or park the car/vehicle in direct sunlight for several hours (for vehicle graphics) to soften the adhesive.
- Pull at a 180-degree angle: When peeling film, pull it back against itself at a 180-degree angle (rather than pulling it straight out from the glass at a 90-degree angle), which reduces the risk of the film breaking and minimizes adhesive residue left on the glass.
- Use plastic scrapers, not metal: Use plastic scrapers (or old credit cards) to lift film edges and remove adhesive residue, rather than metal scrapers or razor blades, which can scratch the glass surface. If you must use a razor blade (for stubborn residue), use a new, sharp blade and hold it at a shallow angle (almost parallel to the glass) to minimize the risk of scratching.
- Use the right adhesive remover: Use a commercial adhesive remover (e.g., Goo Gone, 3M Adhesive Remover, WD-40) or rubbing alcohol (isopropyl alcohol) to remove adhesive residue. Apply the remover to the residue, let it sit for a few minutes to soften, then wipe it away with a clean cloth. Avoid using harsh chemicals or abrasives that can damage the glass or window frame.
- Clean thoroughly before reapplication: After removing old film and adhesive residue, clean the glass thoroughly with glass cleaner and a lint-free cloth to ensure the surface is completely clean and free of contaminants before applying new graphics. Any remaining residue or contaminants can cause bubbles, poor adhesion, or visible imperfections under the new film.
- Consider professional removal: For large, complex, or long-term film applications (particularly frosted/etched film or perforated film that has been applied for several years), consider hiring a professional window film installer to remove the film. Professional installers have the experience, tools, and techniques to remove film quickly and cleanly without damaging the glass or leaving excessive residue, which can save time and effort compared to DIY removal.
Durability, Maintenance, and Regulatory Considerations
Durability and Lifespan
The durability and lifespan of window graphics depend on several factors, including the film type, adhesive type, ink type, lamination, installation quality, environmental conditions (sun exposure, temperature, moisture, wind), and maintenance. Typical lifespans for high-quality window graphics (with proper installation and maintenance) are:
- Static cling film: 6–12 months (outdoor), 1–2 years (indoor). Static cling film is designed for temporary use and may lose adhesion or degrade over time, particularly in harsh outdoor conditions.
- Removable adhesive vinyl (temporary): 1–3 years (outdoor), 3–5 years (indoor). Removable vinyl is designed for short-to-medium-term applications and can be removed cleanly without damaging the glass or leaving excessive residue.
- Permanent adhesive vinyl (opaque, perforated): 5–7 years (outdoor with lamination), 7–10 years (indoor). High-quality permanent vinyl with UV-stabilized inks and lamination can last 5–7 years or more in outdoor conditions, depending on sun exposure and climate.
- Frosted/etched film: 7–10 years (outdoor), 10+ years (indoor). High-quality frosted/etched film is very durable and can last 7–10 years or more, particularly in indoor applications or protected outdoor areas. Some premium frosted/etched films are rated for up to 15 years.
- Safety/security film: 10+ years. Safety/security film is designed for long-term protection and can last 10+ years with proper installation and maintenance.
Factors that can reduce the lifespan of window graphics include: excessive sun exposure (UV rays cause fading and degradation), extreme temperature fluctuations (cause expansion/contraction and adhesive failure), high humidity or moisture (can cause bubbling, peeling, or mold), wind and physical abrasion (can cause scratching, tearing, or edge lifting), improper installation (bubbles, poor adhesion, trapped contaminants), and lack of maintenance (dirt, grime, and chemical exposure can degrade the film and adhesive over time).
Maintenance and Cleaning
Proper maintenance and cleaning help preserve the appearance and extend the lifespan of window graphics. Our guide to LED sign maintenance covers cleaning and care best practices for illuminated signage:
- Wait 72 hours before cleaning: After installation, wait at least 72 hours (3 days) before cleaning the film, allowing the adhesive to fully cure and bond to the glass. Cleaning too soon can cause the film to lift, bubble, or peel.
- Clean regularly with mild soap and water: Clean window graphics regularly (every 1–3 months, depending on the environment and level of dirt/grime) using a mild, non-abrasive dish soap and warm water solution. Apply the solution with a soft cloth or sponge (non-abrasive), gently wiping the film surface to remove dirt and grime. Rinse thoroughly with clean water and dry with a soft, lint-free cloth or squeegee to prevent water spots.
- Avoid harsh chemicals and abrasives: Do not use harsh chemicals (bleach, ammonia, solvents, acetone, gasoline, abrasive cleaners), scouring pads, or rough cloths on window graphics, as these can scratch, cloud, or damage the film surface and degrade the adhesive. Use only mild, non-abrasive cleaners and soft cloths or sponges.
- Avoid pressure washers: Do not use pressure washers or high-pressure water spray on window graphics, as the high pressure can lift the edges, force water under the film, or cause the film to peel or tear. Use a gentle garden hose spray (if needed) or a soft cloth and bucket for cleaning.
- Be careful around edges: When cleaning, be careful around the edges of the film, as aggressive wiping or scrubbing near the edges can cause the film to lift or peel. Wipe from the center outward, using gentle pressure near the edges.
- Inspect regularly for damage: Inspect window graphics regularly for any signs of damage (bubbles, peeling, tearing, fading, discoloration, edge lifting). Address any issues promptly—small bubbles can often be worked out with a squeegee; peeling edges can be re-adhered with a small amount of adhesive or by pressing firmly with a squeegee; damaged or faded sections may need to be replaced.
- Protect from physical damage: Protect window graphics from physical damage by avoiding contact with sharp objects, heavy items, or abrasive surfaces. For ground-floor windows or high-traffic areas, consider adding a protective overlaminate or safety film to enhance scratch resistance and durability.
Regulatory and Lease Considerations
Before installing window graphics, consider any regulatory or lease restrictions that may apply:
- Local sign codes and zoning: Many municipalities have sign codes and zoning regulations that govern window signage, including limits on the percentage of window coverage (commonly 25–30% of the window area for ground-floor commercial spaces), restrictions on certain types of content (e.g., neon or animated signs, off-premise advertising), and permit requirements for certain types of window signage. Always check with the local building department or planning department to determine if a permit is required and what restrictions apply to window graphics in your area. For illuminated or backlit window displays, our guide to LED sign certification explains compliance requirements for lighting and electrical components. Our guide to outdoor sign permits and zoning provides additional information on sign regulations.
- Historic district and design review: If your business is located in a historic district or design review overlay district, window graphics may be subject to additional design review and approval requirements, including restrictions on materials, colors, size, and placement. Always consult with the local historic preservation commission or design review board before installing window graphics in a regulated district.
- Lease restrictions: If you are leasing your commercial space, review your lease agreement for any restrictions on window signage or alterations. Many commercial leases require landlord approval before installing window graphics or other alterations, and some leases restrict the type, size, or placement of window signage. Some leases also require the tenant to remove window graphics and restore the windows to their original condition at the end of the lease term. Always obtain written landlord approval before installing window graphics, and choose removable film (rather than permanent film) if you anticipate needing to remove the graphics at the end of the lease.
- Building owner/property management approval: For multi-tenant buildings (shopping centers, office buildings, mixed-use developments), the building owner or property management company may have specific signage standards and approval processes for tenant window graphics. Always consult with the property management company before installing window graphics, and ensure the graphics comply with the building’s signage standards (which may specify acceptable materials, colors, sizes, and placement).
- Visibility and egress requirements: Ensure window graphics do not obstruct required visibility (e.g., for drivers entering/exiting a parking lot, for pedestrians crossing a sidewalk) or emergency egress (e.g., exit windows, fire escape routes). Some building codes and fire codes restrict the amount of window coverage in certain areas (e.g., exit doors, emergency egress windows) to maintain visibility and safety. Always ensure window graphics comply with applicable building and fire code requirements.
Hongbo Sign Window Graphics and Frosted Vinyl Solutions
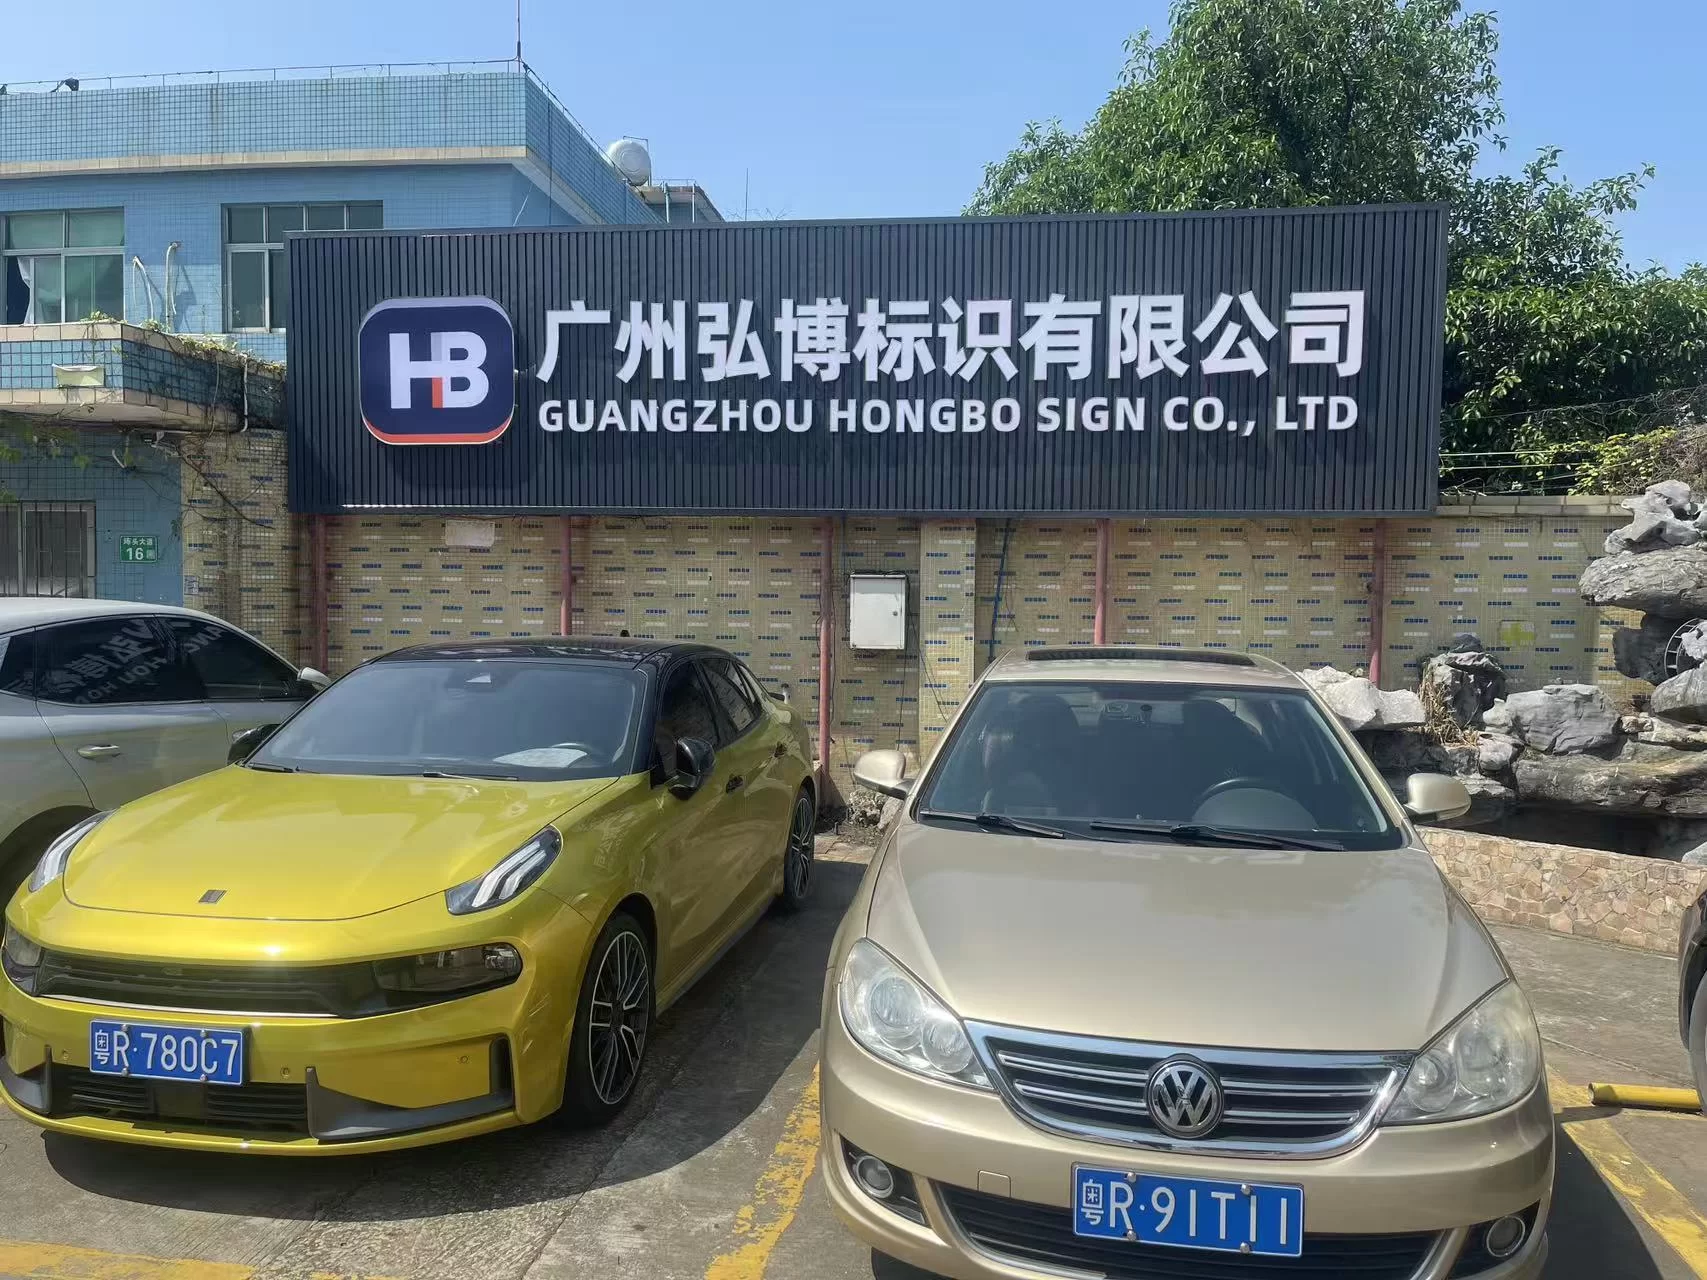
At Hongbo Sign, we design and manufacture high-quality custom window graphics and frosted vinyl signage for retail stores, restaurants, salons/spas, offices, healthcare facilities, schools, and corporate buildings. With over a decade of experience in commercial signage manufacturing and a deep understanding of the unique requirements of window graphics (film types, installation methods, durability, regulatory compliance), we deliver high-quality, visually striking, durable window graphics that enhance your space, reinforce your brand, and achieve your functional goals (privacy, advertising, decoration, wayfinding).
- Comprehensive product range: We offer a full range of window graphic and vinyl film products, including perforated window film (one-way vision for full-window advertising), opaque window vinyl (solid/block-out for privacy and high-impact graphics), frosted/etched window film (translucent privacy film in a range of finishes and opacities), translucent window film (colored/light-diffusing decorative film), clear/protective window film (anti-graffiti, safety/security, UV-blocking), static cling film (reusable/temporary), and custom-printed window graphics (full-color, high-resolution prints using UV-curable, solvent, or latex inks). We also offer cut vinyl lettering, logos, and decorative elements (using plotter/cut vinyl in a wide range of colors and finishes), plus 360-degree acrylic faux neon signs for eye-catching window-adjacent displays.
- Custom design services: We offer comprehensive custom design services for window graphics, working with you to understand your goals (advertising, branding, privacy, decoration, wayfinding), your space (window dimensions, building architecture, interior design), and your brand identity (colors, fonts, logo, design style), and creating custom window graphic designs that meet your specific needs and aesthetic preferences. Our design team can create everything from simple lettering and logos to complex full-window graphics, murals, and decorative patterns. We provide digital proofs and mockups (including site-specific mockups showing the graphics on your actual windows) for your review and approval before production.
- High-quality materials and printing: We use only high-quality, commercial-grade window film and vinyl from reputable manufacturers (3M, Avery Dennison, Oracal, and other premium brands), ensuring durability, color vibrancy, and long lifespan. Our digital printing uses high-resolution, UV-stabilized inks (UV-curable, solvent, or latex) for vibrant, fade-resistant colors, and we apply a clear protective overlaminate to all outdoor printed graphics (perforated film, opaque vinyl) to enhance durability, UV resistance, and weather resistance. We offer a range of film finishes (matte, satin, glossy, textured) and opacities to achieve your desired appearance and functional goals.
- Professional installation support: We provide comprehensive installation instructions, application solution recipes, and tool recommendations for DIY installation, and we can also coordinate with your local professional window film installer for complex or large-scale projects. We offer guidance on surface preparation, wet vs. dry application methods, trimming techniques, and troubleshooting common installation issues (bubbles, wrinkles, edge lifting, adhesive residue). Our goal is to ensure a smooth, professional installation result, whether you choose DIY or professional installation.
- Removal and replacement guidance: We provide guidance on proper removal techniques for all our window graphic products, including heat application methods, adhesive removal recommendations, and surface preparation for reapplication. We can also recommend replacement film options if you are updating your graphics or changing your branding, ensuring compatibility with your existing windows and minimizing downtime during the transition.
- Regulatory compliance support: We provide guidance on local sign codes, zoning regulations, lease restrictions, and building/fire code requirements that may affect your window graphics, and we can recommend film types and designs that comply with applicable regulations (e.g., window coverage limits, egress visibility requirements, historic district design standards). Our guide to outdoor sign permits and zoning provides additional information on sign regulations, and we can advise on how to navigate the permit process for window graphics in your area.
- Multi-location rollout capability: Whether you need window graphics for a single storefront or a multi-location retail/restaurant/office rollout, we have the production capacity and project management systems to deliver consistent, high-quality window graphics across all locations. We offer centralized project management, coordinated production and shipping schedules, brand consistency controls, standardized design templates, and bulk pricing for large orders. We can also create window graphic design standards for your business, ensuring consistent branding and messaging across all current and future locations.
- Competitive factory-direct pricing: As a direct manufacturer, we offer competitive factory-direct pricing with no middleman markup. We provide transparent, itemized quotations with no hidden fees, and we can work with you to find cost-effective solutions that meet your budget without compromising quality, durability, or visual impact. We offer volume discounts for large orders and multi-location rollouts, and we can recommend film types and designs that balance your desired appearance with your budget constraints.
We understand that window graphics are a powerful, versatile tool for enhancing your space, communicating with customers, and achieving your functional goals (privacy, advertising, decoration, wayfinding), and we are committed to delivering high-quality, visually striking, durable window graphics that meet your specific needs and exceed your expectations. From initial design and consultation to production, quality control, shipping, and installation support, we are with you every step of the way.
Ready to transform your windows with custom graphics or frosted vinyl? Contact us today for a free consultation and factory-direct quote. Our design team will work with you to create window graphics that enhance your space, reinforce your brand, and achieve your functional goals.