

What Are Push-Through Letters?
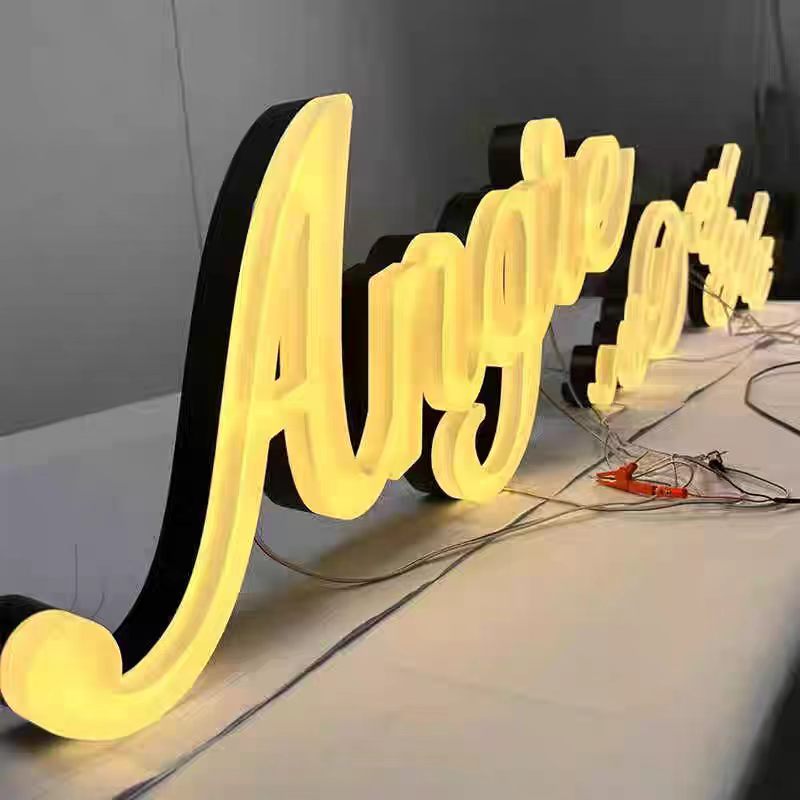
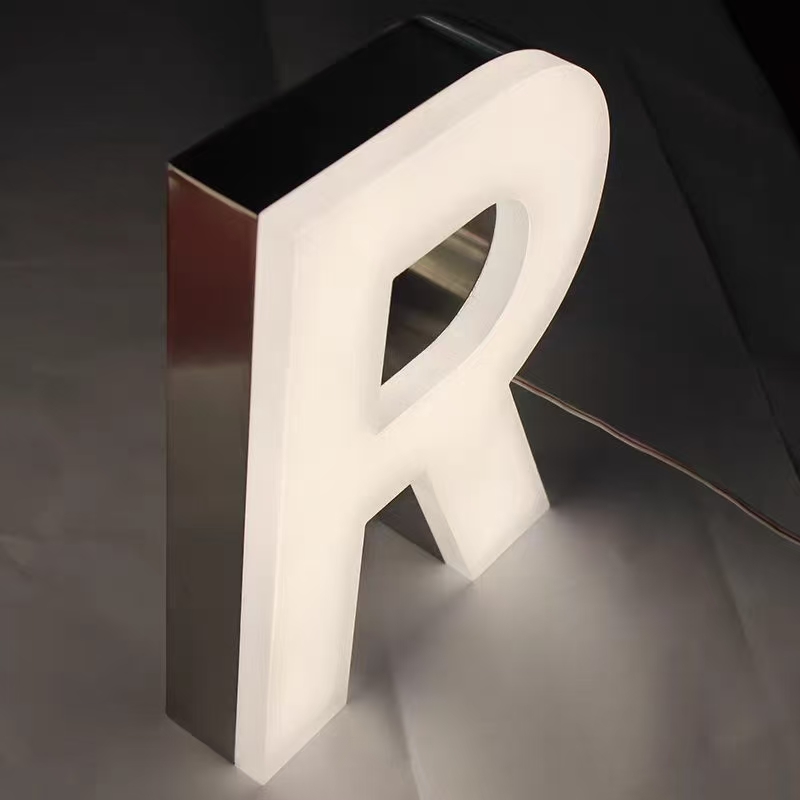
Push-through letters (also known as acrylic face letters, push-through acrylic letters, or face-illuminated letters) are a popular type of illuminated dimensional letter sign where the letter face is made of translucent acrylic that “pushes through” a cutout in a metal sign cabinet or raceway, with the acrylic face protruding slightly from the metal surface. The interior of the sign cabinet contains LED modules that illuminate the translucent acrylic letter face from behind, creating a bright, even, front-lit glow that makes the letters highly visible day and night. Push-through letters combine the dimensional appearance of metal letters with the bright, uniform illumination of acrylic face letters, making them a versatile and attractive choice for a wide range of commercial signage applications.
Push-through letters are commonly used for storefront signs, building fascia signs, monument signs, pylon signs, and indoor lobby signs. They are particularly popular for retail stores, restaurants, banks, professional offices, and automotive dealerships, where bright, eye-catching illumination and a clean, professional appearance are desired. Push-through letters can be customized with a wide range of acrylic colors, metal cabinet finishes, LED colors, and letter fonts, allowing for a high degree of brand customization.
This guide provides a comprehensive overview of push-through letters, including their construction and materials, illumination options (front-lit, backlit/halo-lit, combination), design considerations, installation methods, cost factors, maintenance requirements, and best practices for sourcing high-quality custom push-through letter signs. Whether you are specifying push-through letters for a new storefront, upgrading an existing sign, or comparing push-through letters to other illuminated letter options (such as front-lit channel letters or halo-lit letters), this guide will help you understand the advantages, limitations, and cost considerations of this popular sign type.
Construction and Materials of Push-Through Letters
Push-through letters consist of several key components that work together to create a durable, well-illuminated sign. Understanding the construction and materials of push-through letters helps you make informed decisions when specifying and purchasing this type of sign.
1. Acrylic Letter Face
The letter face is the most visible component of a push-through letter sign, made from translucent acrylic sheet that is cut to the shape of each letter or logo element. The acrylic face “pushes through” a precisely cut opening in the metal sign cabinet, with the front surface of the acrylic protruding slightly (typically 1/4″–1/2″) from the metal cabinet surface. This creates a dimensional, raised appearance while allowing the acrylic to be illuminated from behind by LEDs inside the cabinet.
Acrylic materials and grades:
- Cast acrylic: The highest quality and most common choice for push-through letter faces. Cast acrylic has excellent optical clarity, uniform light transmission, good chemical resistance, and is available in a wide range of colors and thicknesses. Cast acrylic is more expensive than extruded acrylic but offers superior quality and consistency.
- Extruded acrylic: A more economical option with slightly lower optical clarity and consistency than cast acrylic. Extruded acrylic is suitable for standard applications where cost is a primary concern, but may have slight thickness variations or optical imperfections that can affect illumination uniformity.
- Acrylic thickness: Push-through letter faces are typically 1/4″ (6mm) or 3/8″ (10mm) thick. Thicker acrylic (3/8″) provides a more substantial, premium appearance and better edge visibility, but is more expensive and may require more LED power to illuminate uniformly. 1/4″ acrylic is the most common and cost-effective choice for most applications.
- Acrylic colors: Push-through letter faces are available in a wide range of translucent acrylic colors, including white (the most common, providing the brightest illumination), red, blue, green, yellow, orange, and custom colors. White acrylic is typically used for the brightest, most uniform illumination, with colored vinyl or paint applied to the face (if a specific color is desired) or colored LEDs used to create the desired color effect.
- Acrylic finishes: The front surface of the acrylic letter face may have a matte (non-glare) finish, a glossy finish, or a textured finish. Matte finishes reduce glare and reflections, making the letters easier to read in bright sunlight. Glossy finishes provide a sleek, modern appearance but may show reflections. The edges of the acrylic (where it pushes through the metal cabinet) are typically polished or flame-polished for a clean, smooth appearance.
2. Metal Sign Cabinet / Raceway
The metal sign cabinet (also called a raceway or sign box) is the structural housing that contains the LED modules, power supply, and wiring, and provides the surface into which the acrylic letter faces are pushed. The cabinet is typically constructed from aluminum sheet (0.040″–0.063″ thick) or aluminum composite material (ACM), with a powder-coated or painted finish in the desired color. The cabinet is fabricated with precisely cut openings (using CNC routing or laser cutting) that match the shape of each acrylic letter face, allowing the acrylic to push through the cabinet surface with a tight, uniform gap.
Cabinet construction options:
- Single-sided cabinet: The most common type, with acrylic letter faces on one side of the cabinet. Suitable for wall-mounted signs where only the front face is visible.
- Double-sided cabinet: With acrylic letter faces on both sides of the cabinet. Suitable for freestanding monument signs, pylon signs, or projecting signs where both sides are visible.
- Cabinet depth: The depth of the cabinet (typically 3″–8″) depends on the size of the letters, the LED type and spacing, and the desired illumination uniformity. Deeper cabinets (5″–8″) provide better light diffusion and more uniform illumination, particularly for larger letters, but are more expensive and protrude further from the mounting surface. Shallower cabinets (3″–4″) are more economical and have a slimmer profile but may require higher-density LEDs to achieve uniform illumination.
- Cabinet back: The back of the cabinet is typically removable (for access to LEDs and wiring during installation and maintenance) or has access panels for servicing. The back may also include mounting brackets, wire access holes, and ventilation slots (to dissipate heat from LEDs and power supply).
- Cabinet finish: The metal cabinet is typically finished with powder coating (the most durable and common choice) or wet paint, in a color that matches the building facade or brand identity. Powder coating provides a durable, weather-resistant finish with a wide range of color options (including custom color matching). The cabinet finish should be compatible with the acrylic letter face color and the overall sign design.
3. LED Illumination System
The LED illumination system consists of LED modules mounted inside the sign cabinet, a power supply (LED driver), and wiring that connects the LEDs to the power supply and the building’s electrical system. The LEDs illuminate the translucent acrylic letter faces from behind, creating a bright, even glow.
LED system components:
- LED modules: Small, self-contained LED units (typically containing 1–3 LEDs each) that are mounted to the inside back of the sign cabinet in a grid pattern. LED modules are available in various brightness levels, beam angles, and colors (white, warm white, cool white, red, green, blue, RGB). The number and spacing of LED modules depend on the cabinet depth, letter size, acrylic color, and desired brightness. Higher-density LED spacing (more LEDs per square foot) provides more uniform illumination with no dark spots or hot spots, but is more expensive.
- LED color temperature: For white illumination, LED color temperature is measured in Kelvin (K), with common options including warm white (2700K–3000K, yellowish-white), neutral white (4000K–4500K, pure white), and cool white (6000K–6500K, bluish-white). The choice of color temperature depends on the brand aesthetic and desired atmosphere. Warm white creates a welcoming, traditional feel, while cool white provides a bright, modern, high-visibility appearance. Neutral white is a versatile choice that works well for most commercial applications.
- Power supply (LED driver): The LED driver converts the building’s AC power (120V/277V in the U.S.) to the low-voltage DC power (typically 12V or 24V) required by the LED modules. The driver must be sized appropriately for the total wattage of the LED system (with a 10–20% safety margin) and must be UL-listed for outdoor use (if the sign is installed outdoors). The driver is typically mounted inside the sign cabinet (in a separate, ventilated compartment) or in a remote location (e.g., inside the building, in an electrical junction box).
- Wiring and connectors: The LED modules are connected to the power supply using low-voltage wiring and waterproof connectors (for outdoor signs). All wiring should be UL-listed, properly rated for the voltage and current, and installed in accordance with local electrical codes (NEC/UL). Wire access holes in the cabinet should be sealed with cable glands or grommets to prevent water intrusion.
- Dimming and control options: Optional dimming controls (0–10V dimming, PWM dimming, or timer-based dimming) can be added to allow the sign brightness to be adjusted, reducing energy consumption and light pollution during nighttime hours. Some systems also include photocells that automatically turn the sign on at dusk and off at dawn, or smart controls that allow remote monitoring and scheduling.
4. Mounting and Installation Hardware
Push-through letter signs require mounting hardware to secure the sign cabinet to the building facade, monument structure, or other mounting surface. Common mounting methods include:
- Wall-mounted (direct mount): The sign cabinet is mounted directly to the building facade using mounting brackets, studs, or threaded rods that are secured to the building structure. The cabinet is typically spaced 1/2″–2″ from the wall (using standoffs or spacers) to allow for ventilation and to create a subtle shadow effect. Direct mount is the most common and economical installation method for storefront and building fascia signs.
- Raceway mount: The sign cabinet is mounted to a separate metal raceway (a narrow, horizontal metal box) that is first secured to the building facade. The raceway contains the power supply and wiring, and the sign cabinet mounts to the front of the raceway. Raceway mounting reduces the number of holes drilled into the building facade (all wiring and mounting is through the raceway) and allows for easier installation and maintenance. Raceway mounting is common for storefront signs where minimizing facade penetration is desired.
- Freestanding / monument mount: For monument signs or pylon signs, the push-through letter cabinet is mounted to a freestanding structure (stone, brick, concrete, or metal monument) or to a pole/pylon structure. The cabinet may be single-sided (mounted to the front of the monument) or double-sided (mounted on top of or within the monument structure). Freestanding mounting requires structural engineering to ensure the sign and structure can withstand local wind loads.
- Projecting / blade mount: For projecting signs (blade signs), the push-through letter cabinet is mounted perpendicular to the building facade, extending out over the sidewalk. Projecting mounting requires a sturdy bracket or arm that supports the weight of the sign and withstands wind loads. Double-sided cabinets are typically used for projecting signs so the letters are visible from both directions.
Illumination Options for Push-Through Letters
Push-through letters offer several illumination options, each creating a different visual effect. The most common illumination options are front-lit (face-illuminated), backlit/halo-lit (reverse-illuminated), and combination front-lit + backlit. Understanding the differences between these options helps you choose the right illumination effect for your sign design and brand aesthetic.
1. Front-Lit (Face-Illuminated) Push-Through Letters
Front-lit push-through letters are the most common and traditional illumination option, where the LEDs inside the cabinet illuminate the translucent acrylic letter face from behind, causing the face of the letters to glow brightly. The metal cabinet surrounding the letters remains unlit (or may have a subtle reflected glow), creating a high-contrast effect between the bright letters and the dark cabinet background. Front-lit push-through letters provide excellent visibility and readability, particularly at night, and are the most economical illumination option.
Advantages of front-lit:
- Bright, uniform illumination of the letter faces
- Excellent visibility and readability day and night
- Most economical illumination option (lower LED and power supply cost)
- Wide range of acrylic colors and LED color options
- Proven, reliable technology with long LED lifespan (50,000+ hours)
Limitations of front-lit:
- The letter faces are the only illuminated element; the cabinet and letter edges do not glow
- May have a more traditional, less modern appearance than halo-lit or combination letters
- Brightness may be reduced if colored acrylic (other than white) is used for the letter faces
2. Backlit / Halo-Lit (Reverse-Illuminated) Push-Through Letters
Backlit or halo-lit push-through letters (also called reverse-illuminated letters) create a subtle, elegant glow effect behind the letters, rather than illuminating the letter faces themselves. In a halo-lit push-through letter design, the acrylic letter face may be opaque (or have a metal face applied to the front), and the LEDs inside the cabinet are directed backward (or the light escapes through the back of the cabinet around the letters), creating a halo or glow effect on the mounting surface behind the letters. Alternatively, some halo-lit designs use a translucent acrylic back panel that allows light to escape around the edges of the letters, creating a halo effect.
It’s important to note that traditional halo-lit letters are typically individual metal letters (not push-through letters in a cabinet) with LEDs mounted on the back of each letter, shining onto the wall behind. However, push-through letter cabinets can be designed to create a similar halo effect by using opaque letter faces and allowing light to escape from the back or edges of the cabinet. This is sometimes called a “cabinet halo” or “reverse-illuminated cabinet” design.
Advantages of backlit/halo-lit:
- Elegant, sophisticated, modern appearance
- Subtle, non-glaring illumination that creates a premium ambiance
- Letter faces can be made of metal (brushed stainless steel, aluminum) for a high-end daytime appearance
- Reduced light pollution compared to front-lit signs
Limitations of backlit/halo-lit:
- Less visible from a distance than front-lit letters (the halo effect is more subtle)
- More expensive than front-lit (requires opaque letter faces, specialized LED placement, and careful spacing from the wall)
- The halo effect depends on the mounting surface color and texture (works best on light-colored, smooth walls)
- Requires proper spacing from the wall (typically 1″–3″) to create the halo effect
3. Combination Front-Lit + Backlit Push-Through Letters
Combination push-through letters (also called front-lit/back-lit or dual-illuminated letters) combine both front-lit and halo-lit illumination in a single sign, providing the bright visibility of front-lit letters with the elegant halo effect of backlit letters. In a combination design, the acrylic letter faces are translucent (illuminated from the front), and the cabinet is designed to allow light to escape from the back or edges, creating a halo effect on the mounting surface. Combination letters provide maximum visual impact and versatility, with the option to use only front illumination, only halo illumination, or both simultaneously (if separate LED circuits and controls are installed).
Advantages of combination:
- Maximum visual impact and versatility
- Bright, visible letter faces combined with an elegant halo effect
- Option to switch between front-only, halo-only, or both illumination modes
- Premium, high-end appearance that stands out from standard front-lit signs
Limitations of combination:
- Most expensive illumination option (requires two sets of LEDs, separate drivers or controls, and more complex cabinet design)
- Higher energy consumption than single-illumination options
- More complex installation and maintenance
- May be overkill for some applications where front-lit or halo-lit alone would suffice
4. Edge-Lit / Side-Lit Push-Through Letters
Edge-lit or side-lit push-through letters use LEDs mounted along the edges of the acrylic letter face, with light traveling through the acrylic via total internal reflection and exiting through the front surface (which may be etched or textured to diffuse the light). Edge-lit letters create a sleek, modern, ultra-thin appearance, as the LEDs are hidden along the edges of the letters rather than behind them. Edge-lit push-through letters are less common than front-lit or halo-lit options but can be a striking choice for modern, minimalist designs.
Advantages of edge-lit:
- Ultra-thin, sleek, modern appearance
- Uniform illumination with no visible LED hot spots
- Low energy consumption
- Unique, eye-catching visual effect
Limitations of edge-lit:
- Less common and may be more expensive due to specialized fabrication
- Limited to smaller letter sizes (edge lighting is less effective for very large letters)
- Requires high-quality, optically clear acrylic with precise edge polishing
- May have reduced brightness compared to front-lit letters
Design Considerations for Push-Through Letters
Designing effective push-through letter signs requires careful consideration of several factors that affect the sign’s appearance, illumination quality, durability, and cost. Key design considerations include:
1. Letter Size and Font Selection
- Minimum letter size: Push-through letters are typically fabricated with a minimum letter height of 4″–6″, depending on the font complexity and acrylic thickness. Smaller letters may be difficult to fabricate with the push-through method (the acrylic may be too fragile, and the cabinet cutouts may be too small for reliable fabrication). For very small letters (less than 4″), individual channel letters or flat cut letters may be a better option.
- Font selection: Choose a font with adequate stroke width (minimum 1/2″–3/4″ stroke width for most push-through letters) to ensure the acrylic letters are structurally sound and the LEDs can illuminate the strokes uniformly. Fonts with very thin strokes, serifs, or intricate details may be difficult to fabricate as push-through letters and may result in fragile letters or uneven illumination. Bold, sans-serif fonts (e.g., Helvetica Bold, Arial Bold, Gotham Bold) work best for push-through letters, but many other fonts can be used with adequate stroke width.
- Letter spacing: Ensure adequate spacing between letters (minimum 1/2″–1″ between letter edges) to allow for the cabinet material between cutouts and to prevent light bleed between letters. Tight letter spacing (kerning) may require a thinner cabinet material or more precise fabrication, increasing cost.
- Logo and graphic elements: In addition to letters, push-through fabrication can be used for logo elements, icons, and simple graphics. However, very intricate or detailed logos may be difficult to fabricate with the push-through method and may require a combination of push-through letters and other sign elements (e.g., flat cut metal logos, printed graphics).
2. Acrylic Color and LED Color Selection
- White acrylic + white LEDs: The most common and brightest combination, providing pure white illumination. White acrylic transmits the most light, resulting in the brightest, most uniform illumination. LED color temperature (warm, neutral, cool white) can be selected to achieve the desired white tone.
- White acrylic + colored LEDs: Using white acrylic with colored LEDs (red, blue, green, amber, RGB) allows the letter color to be changed by changing the LED color, without changing the acrylic. This is a cost-effective way to achieve colored illumination, and RGB LEDs allow for dynamic color-changing effects. However, colored LEDs may not produce as pure or bright a color as colored acrylic, and RGB LEDs may have color consistency issues across large signs.
- Colored acrylic + white LEDs: Using colored acrylic (red, blue, green, etc.) with white LEDs produces a consistent, saturated color that is not dependent on LED color. Colored acrylic reduces light transmission (compared to white acrylic), resulting in dimmer illumination, but provides a more consistent and saturated color. The acrylic color is visible both day and night (the colored acrylic is visible in daylight, and the colored glow is visible at night).
- Colored acrylic + colored LEDs: Combining colored acrylic with matching colored LEDs can enhance color saturation and brightness, but is more expensive and may result in color inconsistency if the acrylic and LED colors do not match precisely. This combination is typically used only for specific color-critical applications.
- Custom color matching: For brand-specific colors, custom acrylic colors (matched to Pantone or brand color standards) or custom vinyl overlays on white acrylic can be used. Custom color matching adds cost and lead time but ensures brand color accuracy. Always request a physical sample of the custom color (illuminated and unilluminated) before approving production.
3. Cabinet Design and Finish
- Cabinet color: The metal cabinet color should complement the acrylic letter color and the building facade. Common cabinet colors include black (provides high contrast with bright letters, making them stand out), dark bronze/brown (traditional, works well with brick or stone facades), silver/aluminum (modern, metallic appearance), white (clean, blends with light-colored facades), and custom colors (matched to brand or building colors). Black or dark-colored cabinets are the most common, as they provide the highest contrast with illuminated letters and help hide dust and imperfections.
- Cabinet profile: The cabinet can have a square/rectangular profile (the most common and economical), a beveled profile (with angled edges for a more refined appearance), or a custom profile (curved, angled, or shaped to match the building architecture). Custom cabinet profiles add cost but can create a unique, integrated appearance.
- Cabinet size: The cabinet should be sized to accommodate all letters and logo elements with adequate margin (typically 2″–4″ of cabinet material around the perimeter of the letters). The cabinet should also be deep enough to provide uniform LED illumination (typically 3″–8″ deep, depending on letter size and LED type).
- Access and maintenance: The cabinet should include a removable back or access panels to allow for LED and power supply servicing without removing the entire sign from the building. Access panels should be weather-sealed and secured with tamper-resistant fasteners (for outdoor signs).
4. Environmental and Installation Considerations
- Indoor vs. outdoor: Push-through letters can be used for both indoor and outdoor applications. Outdoor signs require weather-resistant materials (marine-grade powder coating, sealed electrical connections, IP65+ rated LEDs and drivers), UV-stabilized acrylic, and structural engineering for wind loads. Indoor signs can use lighter-gauge materials, standard acrylic, and lower IP-rated components, reducing cost.
- Wind load and structural engineering: For outdoor signs, particularly large or freestanding signs, structural engineering calculations may be required to ensure the sign and mounting structure can withstand local wind loads (per ASCE 7 or local building code). The sign manufacturer should provide structural calculations or work with a local structural engineer to ensure compliance.
- Electrical requirements: Ensure the building has adequate electrical capacity (voltage, circuit capacity) to power the sign. The sign should be connected to an unswitched circuit (not controlled by a wall switch) with a dedicated disconnect switch, in accordance with local electrical codes (NEC/UL). A licensed electrician should perform all electrical connections and obtain the required electrical permit.
- Building facade compatibility: Ensure the building facade can support the weight of the sign and that the mounting method is appropriate for the facade material (concrete, brick, stone, EIFS/stucco, glass curtain wall, metal panel). Some facade materials (e.g., EIFS, glass) may require specialized mounting hardware or structural backing to support the sign. Always consult with a structural engineer or building facade specialist for non-standard facade materials.
Cost Factors for Push-Through Letters
The cost of push-through letter signs varies widely depending on several factors, including sign size, letter count, materials, illumination type, cabinet design, installation complexity, and location. Understanding the key cost factors helps you budget effectively and make informed decisions when comparing quotes from different manufacturers.
Key Cost Factors
- Sign size and letter count: The overall size of the sign (cabinet dimensions) and the number of letters/logo elements are the primary cost drivers. Larger signs require more material (acrylic, metal), more LEDs, and a larger power supply, increasing material and labor costs. Signs with more letters require more individual acrylic cuts and cabinet cutouts, increasing fabrication labor. Cost is often estimated on a “per letter” or “per square foot of sign” basis, with volume discounts for larger orders.
- Letter size and font complexity: Larger letters require more acrylic material and more LEDs to illuminate uniformly, increasing cost. Fonts with intricate details, serifs, or very thin strokes require more precise fabrication and may result in more material waste, increasing cost. Simple, bold, sans-serif fonts are the most economical to fabricate.
- Acrylic material and color: Cast acrylic is more expensive than extruded acrylic but offers superior quality. Thicker acrylic (3/8″) is more expensive than standard 1/4″ acrylic. Colored acrylic (especially custom colors) is more expensive than standard white acrylic. Special acrylic finishes (matte, textured, mirror) may also add cost.
- Illumination type: Front-lit is the most economical illumination option. Halo-lit/backlit is more expensive (requires opaque letter faces, specialized LED placement, and wall spacing). Combination front-lit + halo-lit is the most expensive (requires two sets of LEDs, separate drivers, and complex cabinet design). Edge-lit is also typically more expensive due to specialized fabrication. RGB or color-changing LEDs are more expensive than single-color white LEDs.
- Cabinet material and finish: Aluminum cabinets are standard and cost-effective. Stainless steel cabinets (for high-end or coastal applications) are more expensive. Custom powder coat colors (matched to brand or building colors) are more expensive than standard colors. Custom cabinet profiles (beveled, curved, shaped) add fabrication cost. Deeper cabinets (5″–8″) require more material and are more expensive than shallow cabinets (3″–4″).
- LED quality and density: Higher-quality, name-brand LED modules (e.g., Cree, Nichia, Osram) are more expensive than generic LEDs but offer better color consistency, longer lifespan, and better reliability. Higher LED density (more LEDs per square foot) provides more uniform illumination but increases material and labor cost. UL-listed LEDs and drivers are required for code compliance and may be more expensive than non-listed components.
- Installation complexity: Installation costs vary depending on the mounting method, building height, facade material, and location. Ground-level wall-mounted signs are the most economical to install. High-rise building signs (requiring cranes, boom lifts, or rope access) are significantly more expensive. Freestanding monument signs require foundation work and structural installation, adding cost. Electrical installation (by a licensed electrician) is an additional cost, particularly for signs that require new circuit runs or electrical service upgrades.
- Permits and engineering: Sign permit fees, structural engineering calculations (for large or freestanding signs), electrical permits, and design review fees (in historic districts or design review overlays) add to the total project cost. Our guide to outdoor sign permits and zoning provides information on permit costs and requirements.
- Shipping and logistics: For large or international orders, shipping costs can be significant, particularly for oversized sign cabinets that require freight shipping. International orders may also be subject to customs duties, taxes, and import fees. Our guide to shipping terms provides information on FOB, EXW, and CIF options for international orders.
- Warranty and after-sales support: Signs with longer warranty coverage (3–5 years) and comprehensive after-sales support may have a higher upfront cost but provide better long-term value by reducing repair and replacement costs. Our guide to sign warranty and after-sales support provides information on evaluating warranty coverage.
Typical Cost Ranges (U.S. Market, 2026 Estimates)
The following are approximate cost ranges for push-through letter signs in the U.S. market, including materials and fabrication (excluding installation, permits, and shipping). Actual costs may vary significantly based on the factors listed above and regional price differences.
| Sign Type / Size | Approximate Cost Range (Materials + Fabrication) |
|---|---|
| Small storefront sign (4–6 letters, 8″–12″ letter height, front-lit, 4’–6′ wide cabinet) | $1,500 – $3,500 |
| Medium storefront sign (6–10 letters, 12″–18″ letter height, front-lit, 6’–10′ wide cabinet) | $3,500 – $7,500 |
| Large building fascia sign (10–15 letters, 18″–24″ letter height, front-lit, 10’–16′ wide cabinet) | $7,500 – $15,000 |
| Halo-lit / backlit upgrade (in addition to front-lit cost) | +30% – +60% |
| Combination front-lit + halo-lit (in addition to front-lit cost) | +50% – +100% |
| Double-sided cabinet (vs. single-sided) | +40% – +70% |
| Custom color matching / custom cabinet profile | +10% – +30% |
| Installation (typical, ground-level wall mount) | $500 – $2,500 |
| Installation (high-rise / crane required) | $2,500 – $10,000+ |
Note: These are rough estimates for budgeting purposes only. Always obtain detailed, itemized quotes from multiple manufacturers for your specific project. When comparing quotes, ensure you are comparing apples-to-apples (same materials, LED quality, cabinet construction, warranty, and scope of work), as the lowest quote may use lower-quality materials or omit important components.
Maintenance and Care for Push-Through Letters
Proper maintenance and care extend the lifespan of push-through letter signs and ensure they continue to look and perform their best. Push-through letters are relatively low-maintenance, but regular cleaning, inspection, and timely repairs are essential to prevent issues from escalating into costly problems.
Regular Cleaning
- Cleaning frequency: Clean push-through letter signs every 3–6 months, depending on the environment. Signs in high-pollution, coastal, or high-dust areas may require more frequent cleaning (every 1–3 months). Signs in clean, indoor environments may only need annual cleaning.
- Cleaning method: Use a soft cloth or sponge with a mild, non-abrasive detergent (e.g., dish soap) and warm water. Gently wipe the acrylic letter faces and metal cabinet surfaces to remove dirt, dust, and grime. Rinse thoroughly with clean water and dry with a soft, lint-free cloth to prevent water spots.
- Avoid harsh chemicals: Do not use abrasive cleaners, scouring pads, solvents (acetone, benzene, paint thinner), or harsh chemicals (bleach, ammonia) on acrylic surfaces, as these can scratch, cloud, or damage the acrylic. Avoid using pressure washers on the sign, as high-pressure water can force water into the cabinet and damage LEDs or electrical components.
- Cleaning the cabinet: The metal cabinet can be cleaned with the same mild detergent solution. For powder-coated surfaces, avoid abrasive cleaners or tools that can scratch the finish. For stainless steel cabinets, use a stainless steel cleaner and polish to maintain the finish and prevent fingerprints.
Regular Inspection
- Inspection frequency: Inspect push-through letter signs at least annually (or semi-annually for outdoor signs in harsh environments) to identify any issues before they become major problems.
- What to inspect:
- Illumination: Check that all letters are illuminated uniformly, with no dark spots, flickering LEDs, or completely dark letters. Dim or dark letters may indicate a failed LED module, loose connection, or power supply issue.
- Acrylic condition: Check the acrylic letter faces for cracks, chips, yellowing, clouding, or delamination. Damaged acrylic should be replaced promptly to prevent water intrusion and further damage.
- Cabinet condition: Check the metal cabinet for rust, corrosion, dents, scratches, or peeling finish. Check that all seams, joints, and access panels are properly sealed and that no water has entered the cabinet.
- Mounting hardware: Check that all mounting brackets, bolts, and fasteners are tight and secure, with no signs of corrosion or structural fatigue. Loose mounting hardware can be a safety hazard, particularly for high-mounted signs.
- Electrical connections: Check that all wiring is intact, with no frayed insulation, loose connections, or water damage. Check that the power supply is functioning properly and that all electrical connections are weather-sealed.
- Seals and gaskets: Check that all weather seals, gaskets, and cable glands are intact and properly sealed, preventing water intrusion into the cabinet.
Common Repairs and Replacements
- LED module replacement: If individual LEDs or sections of the sign are dark or flickering, the failed LED modules may need to be replaced. LED modules are typically designed for easy replacement (plug-and-play connectors), but accessing the inside of the cabinet may require removing the sign or an access panel. Always use the same type and specification of LED module as the original to ensure color consistency and uniform illumination.
- Power supply replacement: If the entire sign is dark or flickering, the power supply (LED driver) may have failed. Power supplies have a typical lifespan of 5–10 years (shorter in high-temperature environments) and may need replacement during the sign’s lifetime. Always replace the power supply with a UL-listed driver of the same voltage, wattage, and dimming compatibility as the original.
- Acrylic letter replacement: If an acrylic letter face is cracked, chipped, yellowed, or damaged, it can be replaced individually (without replacing the entire sign). The replacement acrylic should match the original in material, thickness, color, and finish. Replacing a single letter typically requires removing the sign or accessing the back of the cabinet to remove the old letter and install the new one.
- Cabinet refinishing: If the metal cabinet finish is faded, scratched, or peeling, the cabinet can be refinished (sanded and repainted/powder-coated) to restore its appearance. Cabinet refinishing typically requires removing the sign from the building and may be done by a local sign shop or refinishing company.
- Mounting hardware replacement: If mounting hardware is corroded, loose, or damaged, it should be replaced promptly to prevent the sign from becoming a safety hazard. Replacement hardware should be corrosion-resistant (stainless steel or galvanized) and rated for the sign’s weight and wind load.
Warranty and Service Contracts
Most push-through letter signs come with a manufacturer’s warranty covering materials and workmanship (typically 1–5 years) and LED components (typically 1–3 years). Our guide to sign warranty and after-sales support provides detailed information on what is typically covered by sign warranties and how to evaluate warranty coverage. For high-value or hard-to-access signs, consider purchasing a service contract or maintenance agreement from a local sign company, which provides regular cleaning, inspection, and repair services for a fixed annual fee. Service contracts can help extend the sign’s lifespan and ensure that any issues are addressed promptly before they become major problems.
Push-Through Letters vs. Other Illuminated Letter Options
When choosing an illuminated letter sign, it’s helpful to compare push-through letters to other common illuminated letter options to determine which is best for your application. The following table provides a comparison of push-through letters, front-lit channel letters, and halo-lit (reverse) channel letters:
| Feature | Push-Through Letters | Front-Lit Channel Letters | Halo-Lit (Reverse) Channel Letters |
|---|---|---|---|
| Construction | Acrylic faces push through cutouts in a metal cabinet; LEDs inside cabinet illuminate faces | Individual 3D metal letters with acrylic faces; LEDs inside each letter illuminate the face | Individual 3D metal letters with LEDs on the back, shining onto the wall behind |
| Illumination | Front-lit (face illuminated); optional halo or combination | Front-lit (face illuminated) | Back-lit / halo (reverse illuminated) |
| Daytime appearance | Acrylic faces in metal cabinet; clean, uniform appearance | Individual 3D letters with metal returns; more dimensional appearance | Metal letter faces (brushed/polished); premium, elegant appearance |
| Nighttime appearance | Bright, uniform letter faces glowing from cabinet | Bright, individual 3D letters glowing | Subtle halo/glow behind letters; letter faces dark |
| Cost | Moderate (less than individual channel letters for many applications) | Higher (each letter is individually fabricated) | Higher (requires metal faces, wall spacing, specialized LEDs) |
| Installation | Single cabinet mount; fewer wall penetrations | Individual letter mounting; more wall penetrations and wiring | Individual letter mounting with spacers; precise wall spacing required |
| Maintenance | Easy access via cabinet back; LEDs and power supply in one location | Individual letter access; may require removing letters to service LEDs | Individual letter access; LEDs on back of letters |
| Best for | Storefront signs, building fascia, monument signs, multi-letter signs, budget-conscious projects | Premium 3D appearance, individual letter spacing, complex logos | Elegant, modern, high-end appearance; low light pollution; light-colored walls |
Push-through letters are often the most cost-effective choice for multi-letter storefront signs, as the single cabinet construction reduces fabrication and installation labor compared to individual channel letters. However, for signs requiring very precise letter spacing, complex 3D appearance, or individual letter illumination (e.g., letters with different colors or effects), individual channel letters may be a better choice. For high-end, elegant designs with a subtle glow effect, halo-lit channel letters are the preferred option. Many signs combine multiple letter types (e.g., push-through letters for the main text with individual halo-lit letters for a logo or tagline) to achieve the desired visual effect.
Hongbo Sign Push-Through Letter Manufacturing
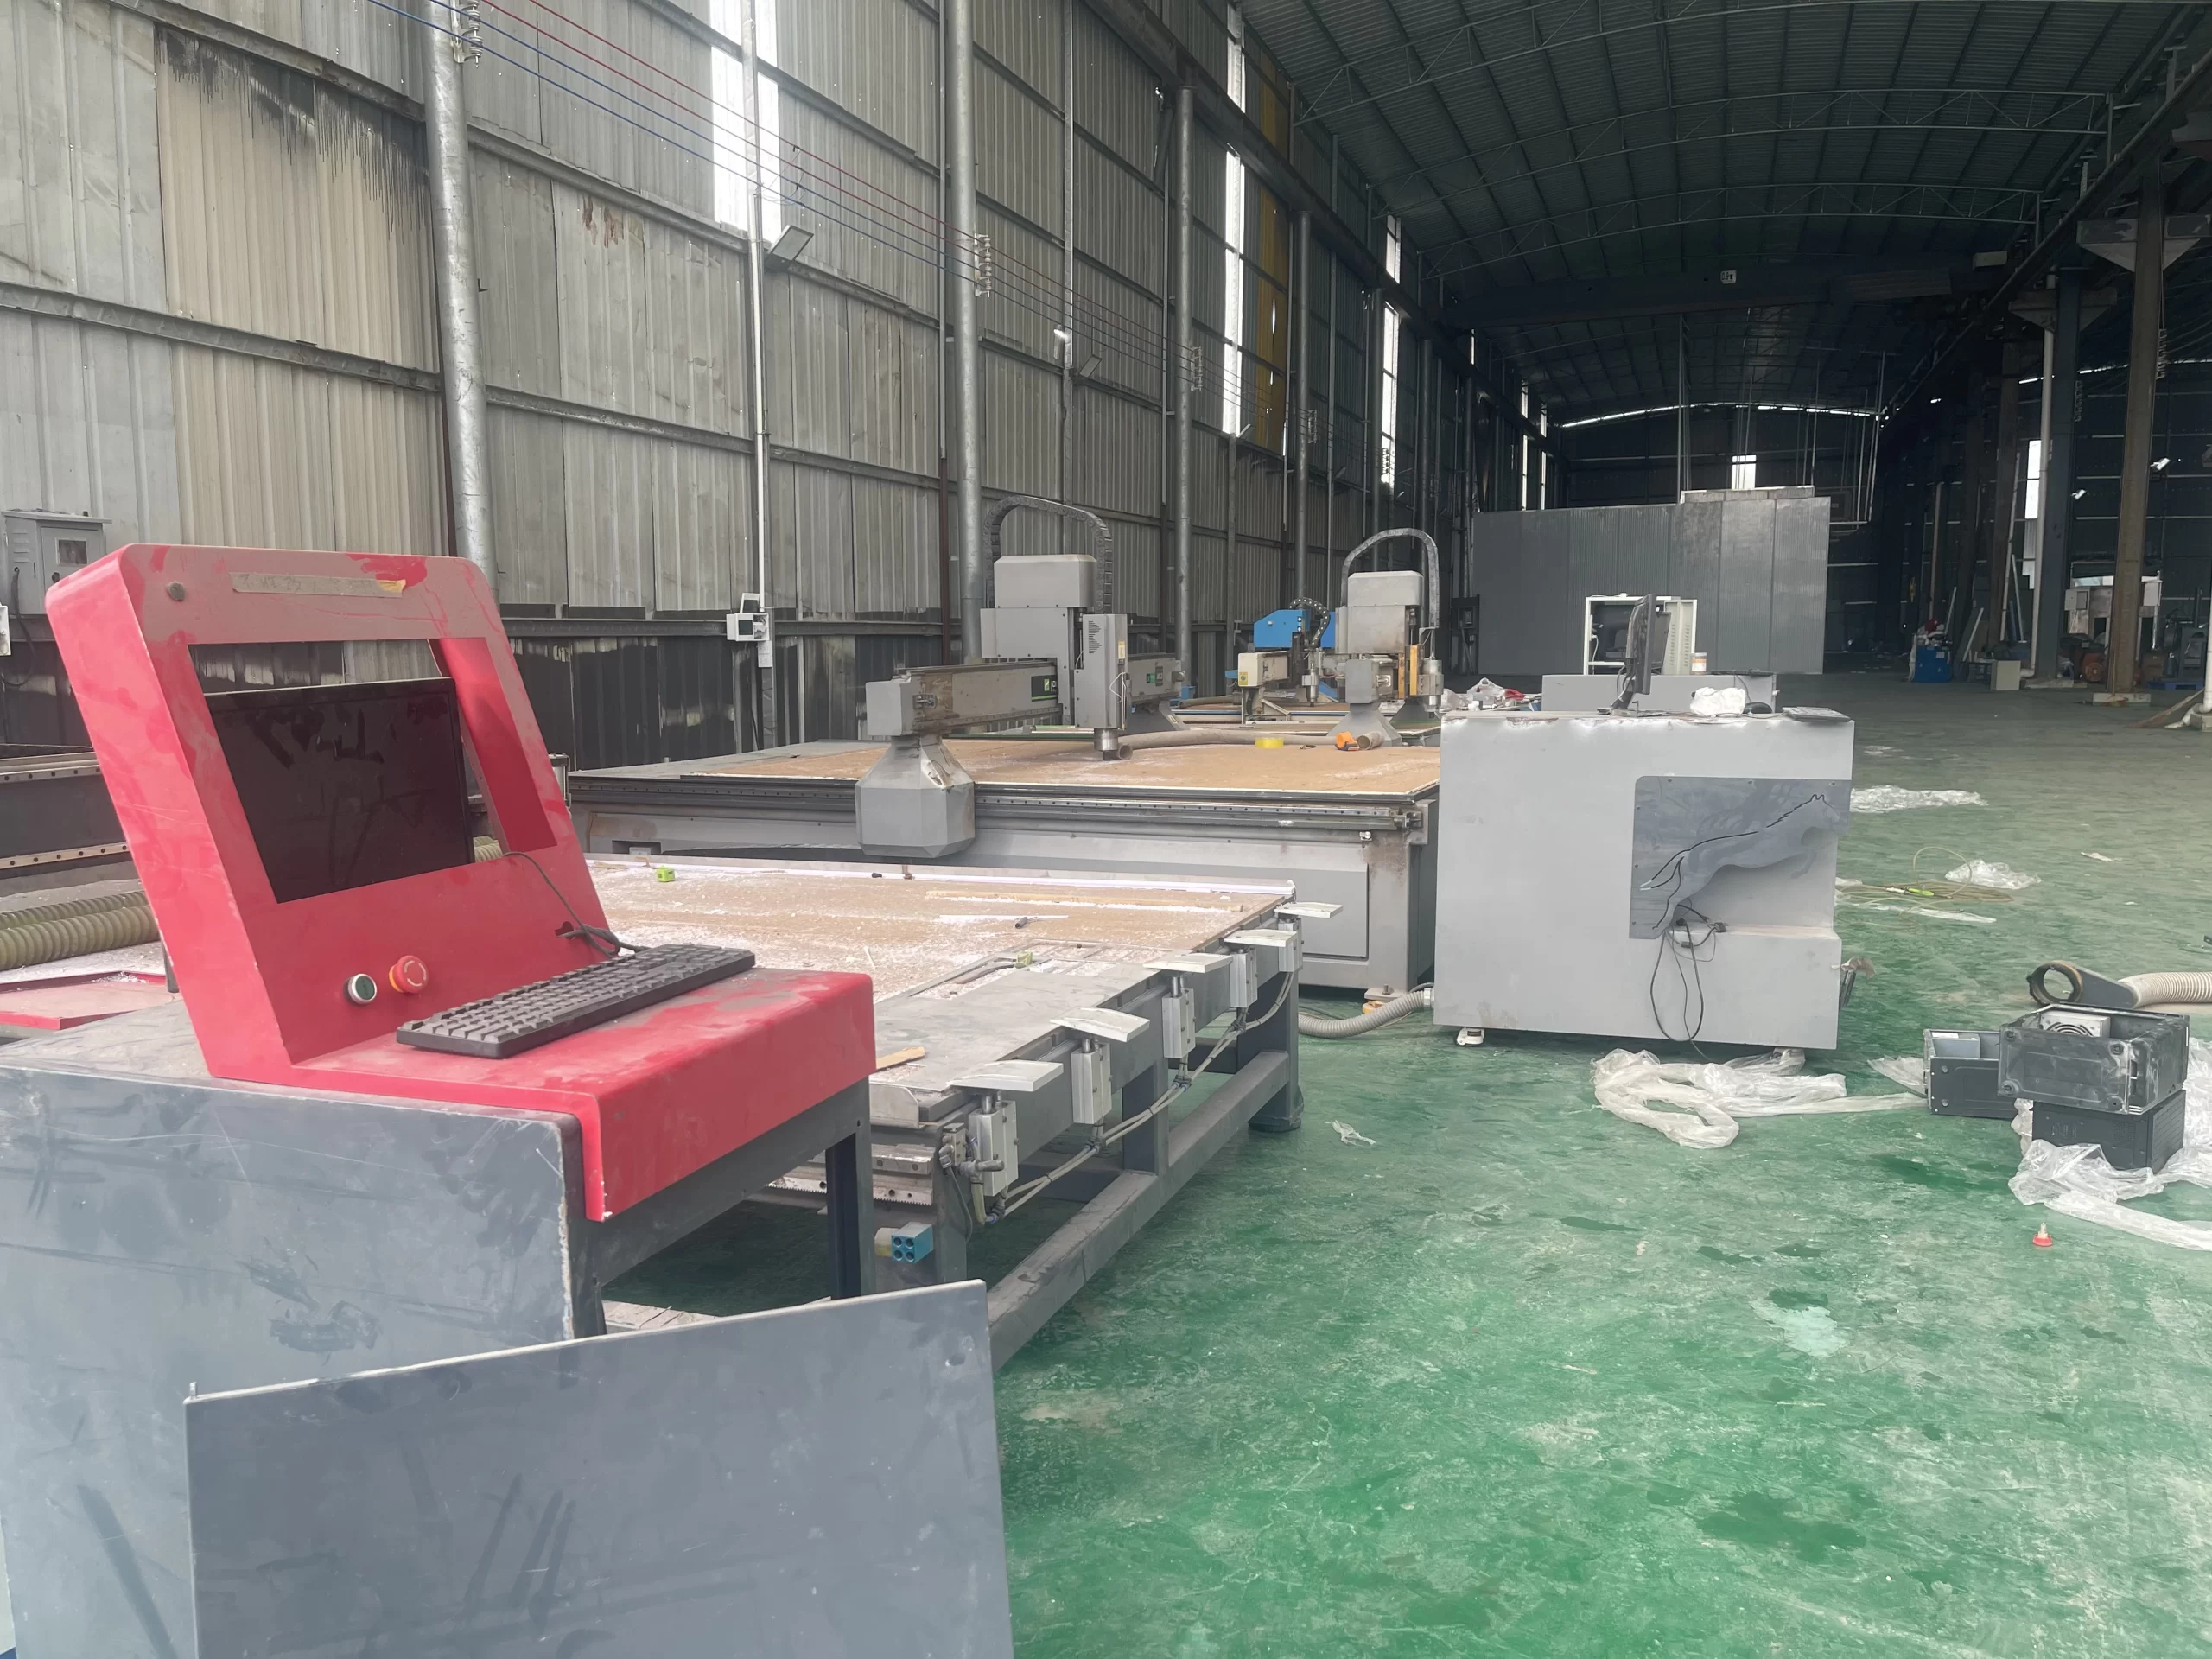
At Hongbo Sign, we design and manufacture high-quality custom push-through letter signs for commercial buildings, retail stores, restaurants, offices, and institutions worldwide. With over a decade of experience in illuminated signage manufacturing and state-of-the-art CNC routing, laser cutting, and LED assembly capabilities, we deliver push-through letters that combine precise fabrication, uniform illumination, durable construction, and competitive factory-direct pricing.
- Precision fabrication: We use CNC routing and laser cutting to fabricate acrylic letter faces and cabinet cutouts with tight tolerances (±0.5mm), ensuring a perfect fit between the acrylic letters and the metal cabinet. Our experienced fabrication team ensures clean, polished acrylic edges and uniform gaps between letters and cabinet.
- High-quality materials: We use premium cast acrylic (1/4″ or 3/8″ thick) for letter faces, with a wide range of standard and custom colors. Our metal cabinets are fabricated from commercial-grade aluminum (0.050″–0.063″ thick) with durable powder coating (standard and custom colors available). We use 304 or 316 stainless steel for high-end or coastal applications.
- Uniform LED illumination: We use high-quality, UL-listed LED modules with precise spacing calculations to ensure uniform, shadow-free illumination across all letter faces, with no dark spots or hot spots. We offer a range of LED color temperatures (2700K–6500K) and colors (white, red, blue, green, amber, RGB) to achieve your desired illumination effect. All LED systems are designed with proper heat dissipation and ventilation to ensure long LED lifespan (50,000+ hours).
- Multiple illumination options: We offer front-lit, halo-lit/backlit, combination (front + halo), and edge-lit push-through letter options, allowing you to choose the illumination effect that best matches your brand aesthetic and design goals.
- Custom design capabilities: We offer fully custom push-through letter designs, including custom cabinet shapes and profiles, custom acrylic colors (Pantone-matched), custom powder coat colors, mixed-material designs (acrylic + metal + stone), and integrated logo/graphic elements. Our in-house design team can work with your brand guidelines or create a custom sign design tailored to your building and brand.
- Structural engineering and code compliance: For outdoor signs, we provide structural engineering calculations (wind load per ASCE 7) and can design signs to meet local building code requirements. All our illuminated signs use UL-listed LED modules and power supplies, ensuring compliance with U.S. electrical safety standards (NEC/UL). We provide all documentation needed for sign permit applications and building inspections.
- Quality control and testing: Every push-through letter sign undergoes rigorous quality control, including dimensional verification, acrylic edge inspection, LED illumination testing (full 24-hour burn-in test for all illuminated signs), power supply testing, weather sealing inspection, and packaging inspection. We provide photos and videos of the completed sign (illuminated and unilluminated) before shipment for your final approval.
- Installation support: We provide comprehensive installation instructions, mounting templates, wiring diagrams, and technical support for your local installation team. For international orders, we can coordinate with your local installer to ensure proper installation and electrical connection. Our guide to shipping terms provides information on FOB, EXW, and CIF options for international orders.
- Competitive factory-direct pricing: As a direct manufacturer, we offer competitive factory-direct pricing with no middleman markup. We provide transparent, itemized quotations with no hidden fees, and we can work with you to find cost-effective solutions that meet your budget without compromising quality, illumination uniformity, or durability.
- Comprehensive warranty: We stand behind our push-through letter signs with a comprehensive warranty covering materials and workmanship (3 years standard, 5 years available for premium products) and LED components (2 years standard, 3 years available for premium LEDs). Our guide to sign warranty and after-sales support provides detailed information on our warranty coverage.
We understand that push-through letters are a significant investment in your business’s visibility and brand image, and we take pride in delivering signs that look great, perform reliably, and last for years. From initial design and proofing to fabrication, quality control, shipping, and after-sales support, we’re with you every step of the way.
Ready to upgrade your storefront or building with high-quality push-through letters? Contact us today for a free consultation and factory-direct quote. Our design team will work with you to create a push-through letter sign that perfectly matches your brand, building, and budget.
Frequently Asked Questions
Q: What are push-through letters?
A: Push-through letters, also known as acrylic face letters or reverse pan channel letters, are fabricated by inserting a pre-formed acrylic letter face through a precisely cut opening in a metal sign cabinet or fascia panel. The acrylic face extends through the panel, creating a flush, seamless appearance with the surrounding metal surface. Internal LED illumination shines through the acrylic face.
Q: What is the difference between push-through letters and standard channel letters?
A: Standard channel letters are individually fabricated 3D letters mounted on the building facade, with visible metal returns. Push-through letters are inserted through a metal panel or cabinet, creating a flush, seamless appearance where only the acrylic face is visible from the front. Push-through letters offer a cleaner, more integrated look and are commonly used on monument signs, pylon faces, and architectural sign cabinets.
Q: Can push-through letters be used outdoors?
A: Yes, push-through letters are suitable for outdoor applications when constructed with appropriate materials and sealing. The acrylic face should be UV-stabilized cast acrylic, and the penetration points through the metal panel must be properly sealed to prevent water intrusion. Always confirm the environmental rating and warranty coverage for outdoor push-through letter installations.